
Keeping the laser lens clean is an important part of maintaining the Longer B1 30W and Longer B1 40W. During laser engraving and cutting, smoke and dust can gradually build up on the protective lens. As the residue increases, less laser energy passes through the lens, which can reduce engraving and cutting performance.
This guide explains how to safely clean the laser module lens on the Longer B1 30W and 40W, helping restore normal laser output and maintain engraving quality.
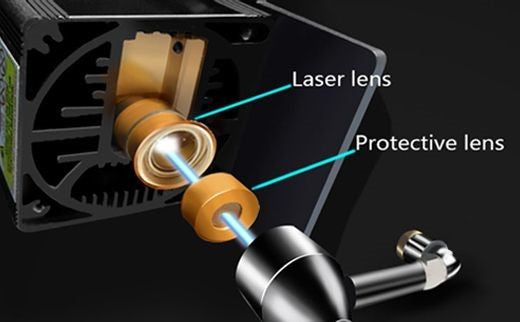
Why Lens Cleaning Is Important
The Longer B1 30W & 40W can engrave and cut a wide range of materials. Depending on the material being processed, a large amount of smoke may be produced during operation.
Over time, smoke residue can settle on the protective lens of the laser module. When the lens becomes dirty or cloudy, the laser beam cannot pass through it efficiently. As a result:
- Laser output is reduced.
- Engraving becomes lighter.
- Cutting performance decreases.
- Higher laser power may be required to achieve the same results.
Eventually, the machine may struggle to engrave or cut materials, even at 100% laser power.
This problem is more likely to occur if an Air Assist system is installed but not enabled. Air Assist helps create airflow around the laser nozzle, reducing the amount of smoke and dust that settles on the lens.
Clean the Laser Module Lens
To restore laser performance, clean the protective lens of the laser module.
Step 1: Remove the Laser Module
First, remove the laser module from the machine. After separating it from the engraver, remove the four screws shown in the figure.
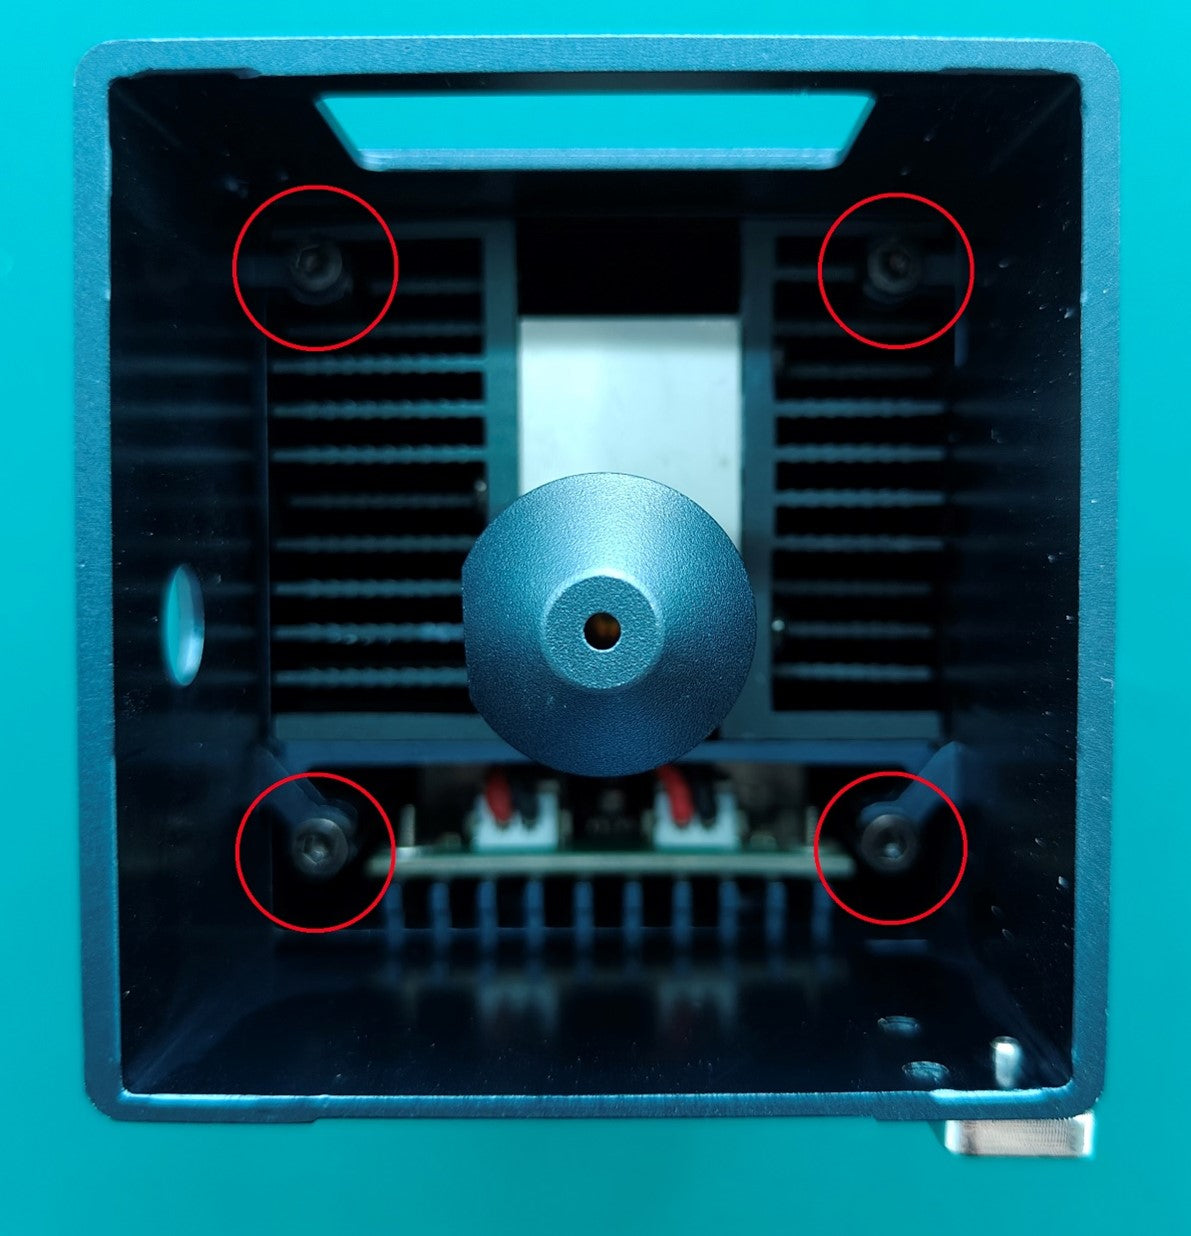
Step 2: Remove the Protective Shield
After removing the screws, take off the protective shield. Next, loosen the small screw on the side of the Air Assist nozzle and remove the nozzle.
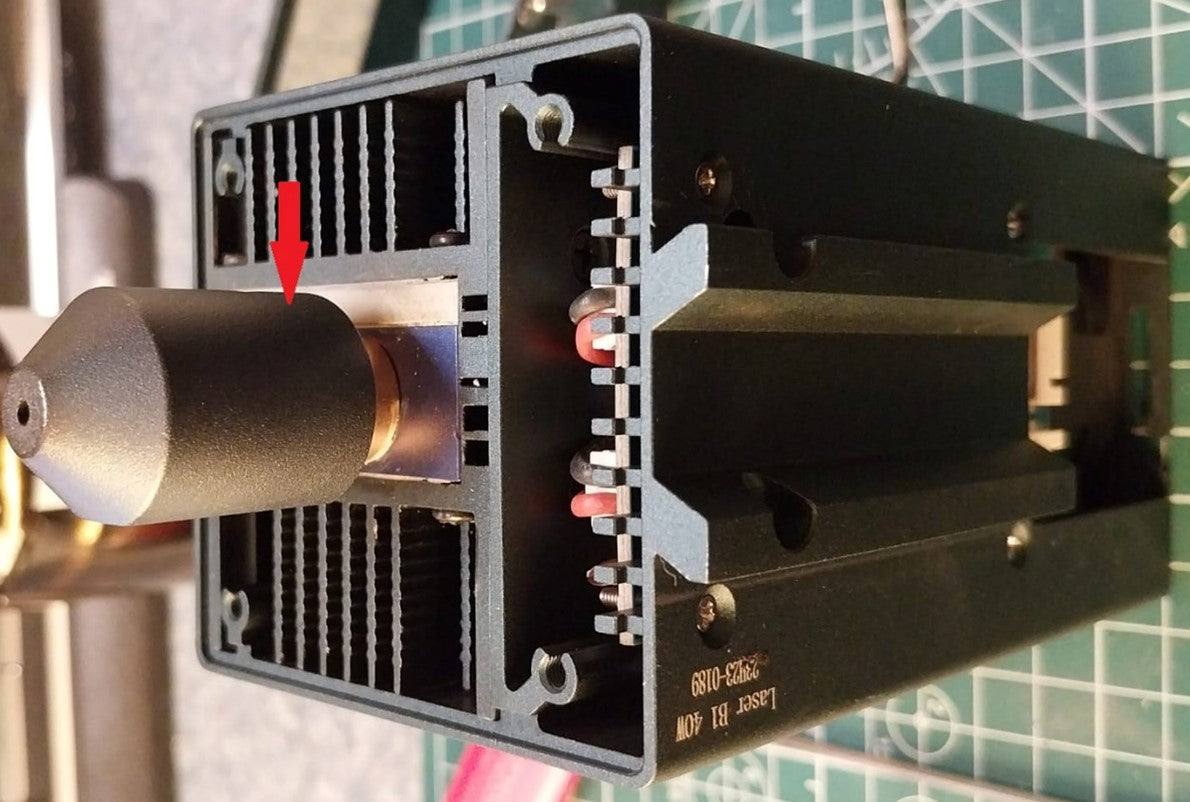
Step 3: Remove the Protective Lens
The Longer B1 30W & 40W laser module is equipped with a factory-installed protective lens. This lens is a protective glass only. It is not the focusing lens, so it can be removed for cleaning or replacement. Carefully unscrew the protective lens from the laser module.
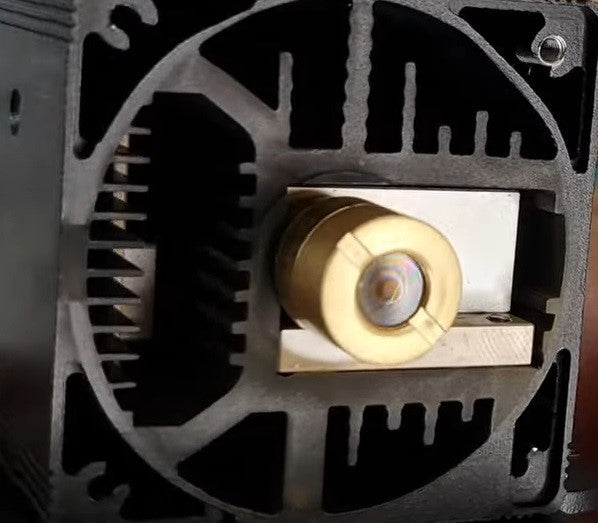
Step 4: Clean the Lens
Use a cotton swab moistened with alcohol to clean the protective lens. If necessary, use additional clean cotton swabs until all dirt and smoke residue have been removed.
Important: Do not allow alcohol to enter the inside of the lens assembly.
Step 5: Reassemble the Laser Module
After the protective lens is completely clean and dry, reinstall it onto the laser module. Reassemble the Air Assist nozzle, install the protective shield, and mount the laser module back onto the machine.
Test the Laser Module
After reassembly, engrave one of the sample files included on the microSD card supplied with the Longer B1 30W & 40W. This allows you to check whether the laser output has returned to normal after cleaning. If the protective lens is heavily contaminated and cannot be cleaned, contact LONGER to purchase a replacement lens.
Conclusion
Regular lens cleaning helps maintain the performance of the Longer B1 30W & 40W. Removing smoke residue from the protective lens allows the laser beam to pass through more efficiently, improving both engraving and cutting results.
Inspect the protective lens regularly and keep Air Assist enabled whenever possible. Routine maintenance can help maintain stable laser performance and extend the service life of the laser module.
Share:
LONGER How to:Techniques for engraving black anodized aluminum plates with RAY5 series laser engraving machines
LONGER HOW TO:Laser Engraving Slate with the Nano Pro