
Using a rotary attachment allows your LONGER laser engraver to work on cylindrical and round objects, such as cups, bottles, rings, and other curved materials. To achieve accurate engraving results, LightBurn’s rotary mode needs to be properly configured before starting your project.
This guide explains how to connect a rotary attachment, enable LightBurn Rotary Mode, adjust rotary parameters, and perform a test engraving for stable and precise results.
1. What Is Rotary Mode
Rotary Mode in LightBurn is a function designed for engraving cylindrical or symmetrical objects with rotary attachments, including roller-style and chuck-style devices.
Instead of moving the material along the Y-axis, the rotary attachment rotates the object while the laser engraves the design. This allows users to create accurate patterns, text, and graphics on curved surfaces.
2. Connecting the Rotary Attachment
(1)Connect the Rotary Attachment to the Y-Axis
Disconnect the Y-axis motor cable from the laser machine and connect it to the chuck or roller. If the motor jitters or does not rotate properly, it may be due to mismatched wiring in the extension cable. Try using another adapter cable with a different wire sequence.
(2)Connect the Laser Engraver to LightBurn
Turn on the machine and confirm that the laser engraver is properly connected to the computer. Make sure the correct COM port and device profile are selected in LightBurn.
(3) Load the material
Adjust the roller spacing or chuck diameter according to the diameter of the material. Place the object securely on the chuck or roller and manually rotate it to ensure the object is stable and does not wobble.
(4) Adjust the focus
Move the laser head to the top surface of the material. Use a focusing tool to align the laser’s focal point precisely with the top of the material.
3. Configuring Rotary Parameters
To enable rotary mode quickly and accurately, follow these steps:
a. Select the design:
On the LightBurn canvas, select the design you want to rotate or import the file you plan to engrave.
b. Access the rotary tool settings:
Click the Rotary Setup icon on the toolbar to enter the rotary configuration panel. Using the roller-type rotary as an example, follow these steps:
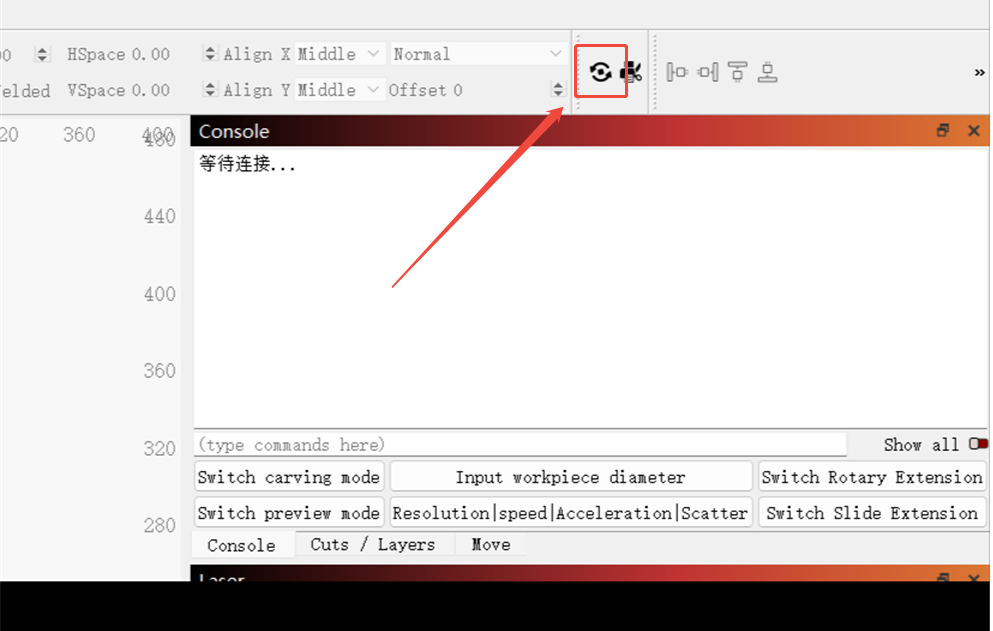
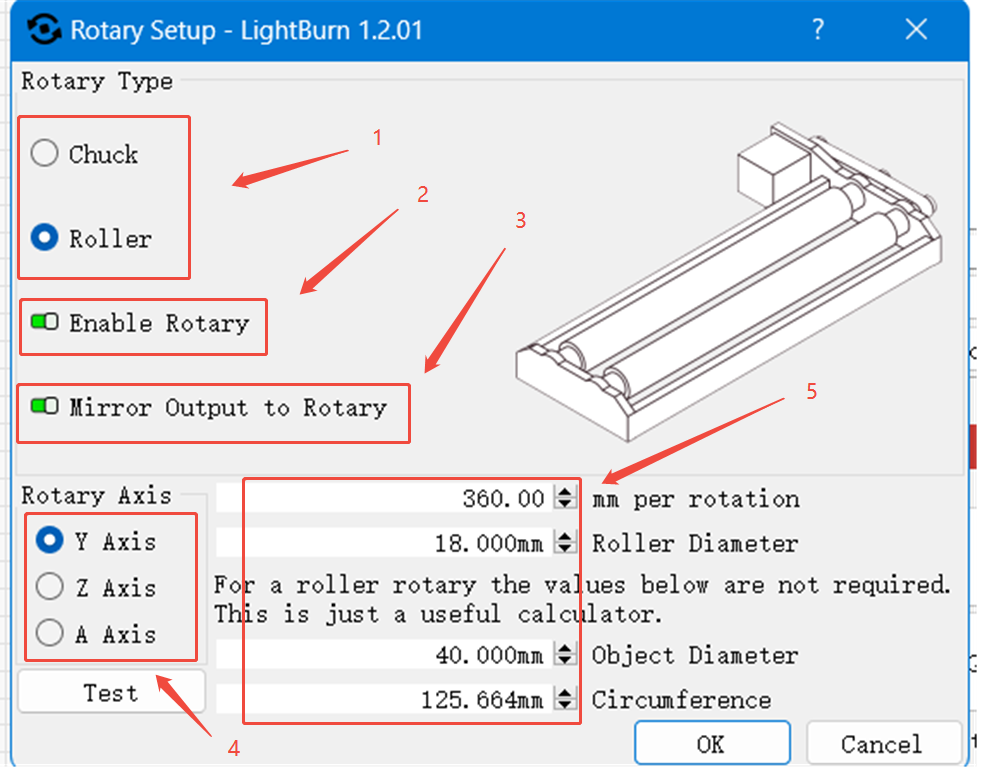
(1) Choose Rotary Tool Type
In the Rotary Type section, select the type of rotary tool based on your hardware:
- Roller (cylindrical rollers)
- Chuck (rotating clamps)
(2) Enable or Disable Rotary Function
Check the "Enable Rotary" option to turn on rotary support. If the rotary is not needed, uncheck this option to disable it.
(3) Enable Mirror Output (Optional)
Check "Mirror Output to Rotary" to enable mirrored engraving. This is useful for certain design requirements.
(4) Select the Rotary Axis
Assign the rotation to the correct motor axis. Typically, the Y-axis is used as the rotary axis.
(5) Set Rotary Parameters
- Steps per rotation: Input the number of motor steps required for one full rotation. This ensures accurate control of the rotary motion.
- oller diameter: Enter the diameter of the roller. This allows the software to calculate movement distances correctly.
- Object diameter: Enter the diameter of the item being engraved.
- Circumference: Once the object diameter is entered, LightBurn will automatically calculate the circumference. No manual input is needed.
4. Test Rotary Engraving Before Final Work
Before starting a complete engraving project, run a small test engraving. A test run helps confirm:
- Correct rotary direction
- Accurate design positioning
- Proper parameter settings
Making adjustments before the final engraving can help avoid material waste and improve engraving quality.
Conclusion
Correctly enabling Rotary Mode in LightBurn is essential for achieving accurate engraving on cylindrical objects. By properly connecting the rotary attachment, setting the correct parameters, and testing before engraving, you can improve engraving stability and consistency.
Whether you are using a roller or chuck rotary attachment, following the correct LightBurn setup process helps your LONGER laser engraver handle more creative engraving projects with better precision and efficiency.
Share:
How to make an object positioning grid for Longer Nano & Longer Nano Pro
How to Install and Setup the new Longer Ray5 Mini