
Introduction
When designing laser engraving projects, repeating patterns are often used for decorative designs, textures, logos, and multiple identical objects.
Creating each copy manually can take extra time and make it difficult to keep objects evenly spaced.
The Create Array function in LightBurn allows users to quickly generate multiple copies of selected objects and arrange them in a specific pattern. This feature helps improve design efficiency and makes it easier to prepare complex engraving projects.
This guide explains how to use Create an Array of the Selected Objects in LightBurn to quickly create repeating patterns for your laser engraving designs.
What Is the Create Array Function in LightBurn?
The Create Array tool allows you to duplicate selected objects and organize them automatically based on your settings.
Instead of copying and positioning each object manually, you can use the array function to create:
- Rows of repeated designs
- Columns of repeated designs
- Evenly spaced patterns
- Multiple identical engraving elements
This is especially useful when creating projects that require consistent spacing and alignment.
Step-by-Step Instructions
Launch LightBurn
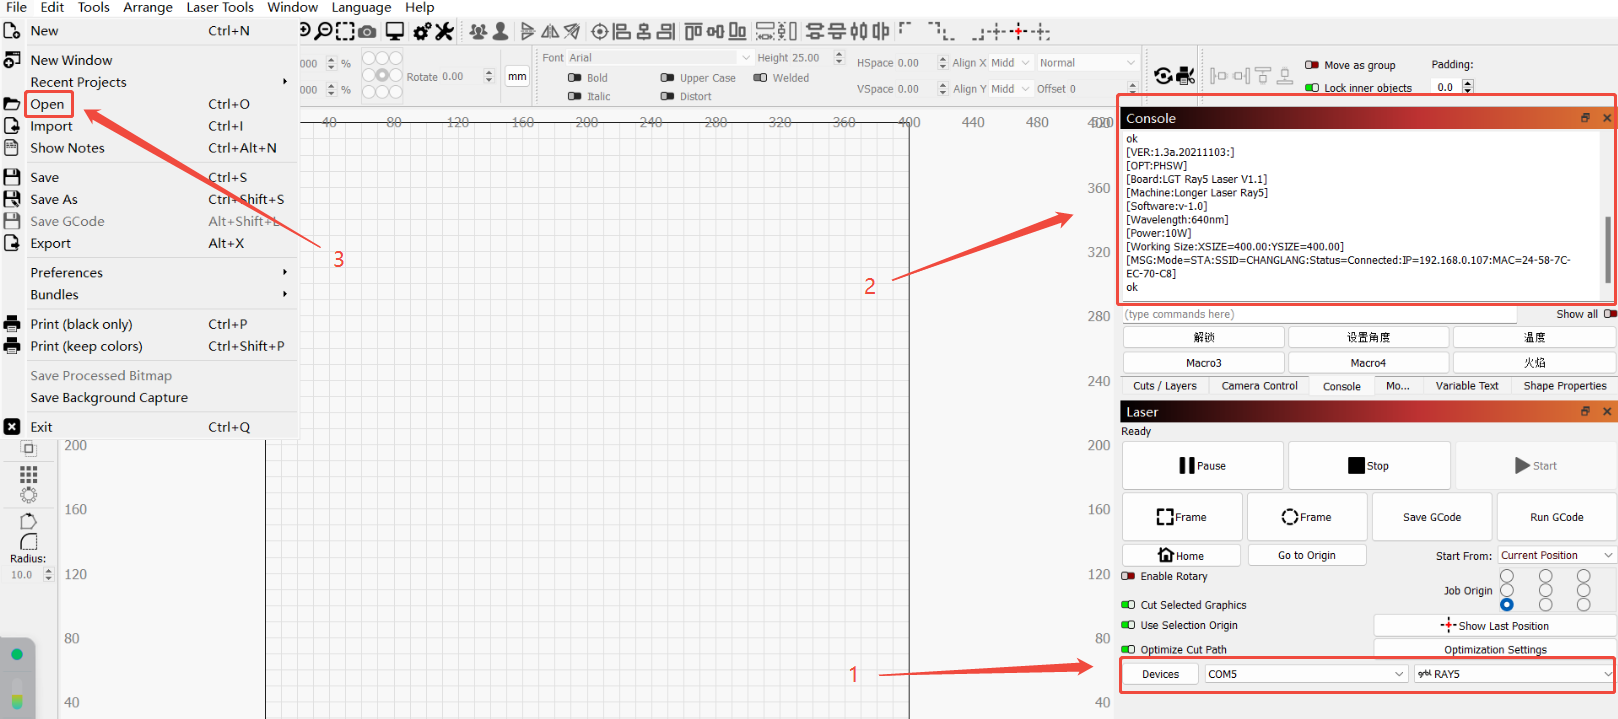
Open the LightBurn software and import your machine configuration. Make sure to select the correct communication port and load the configuration for the RAY5 machine. When the console displays “RAY5 Connected Successfully,” proceed to the next step.
Import the Vector Design
Click on the “File” menu in the toolbar and choose “Import” to bring in the vector image of the cat design.
Configure Cutting Parameters
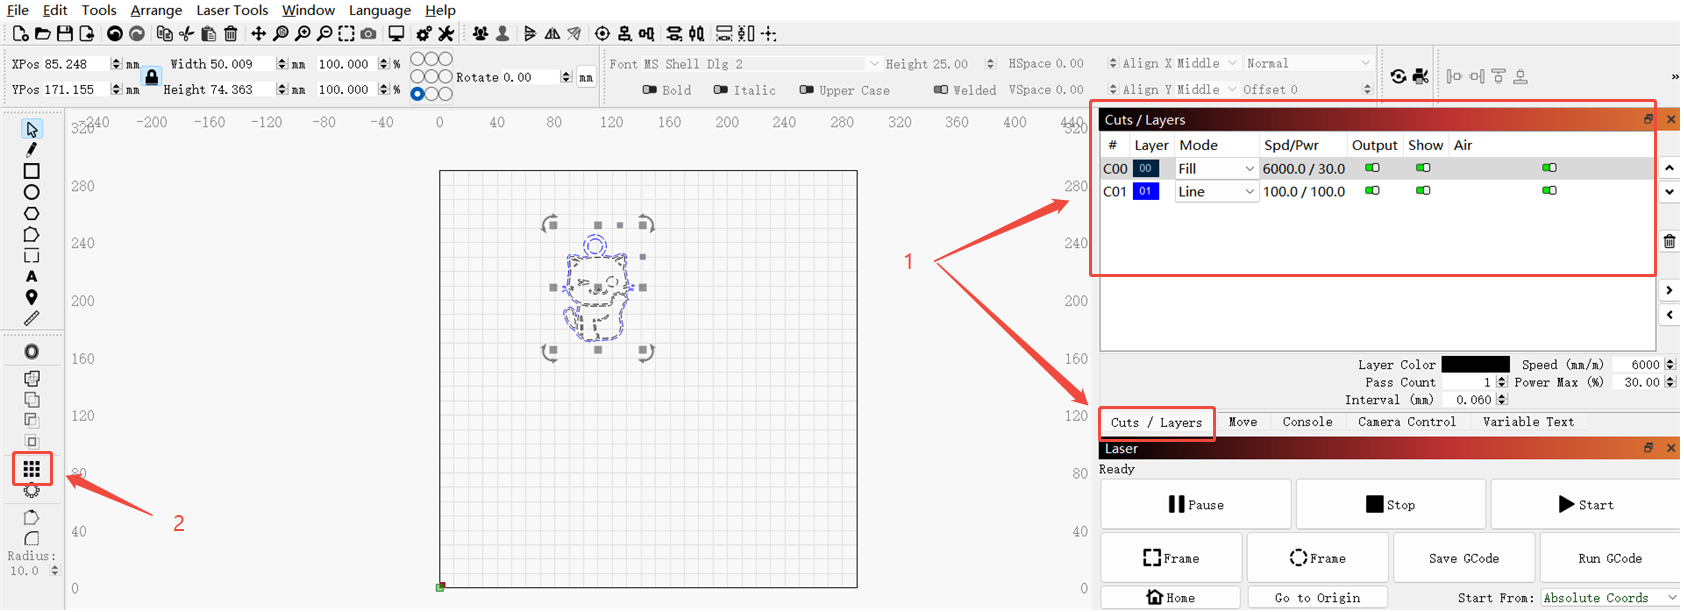
After importing the design, select the object you want to cut. Click on “Cuts” to set the appropriate power and speed values according to your material and project requirements.
Create the Array
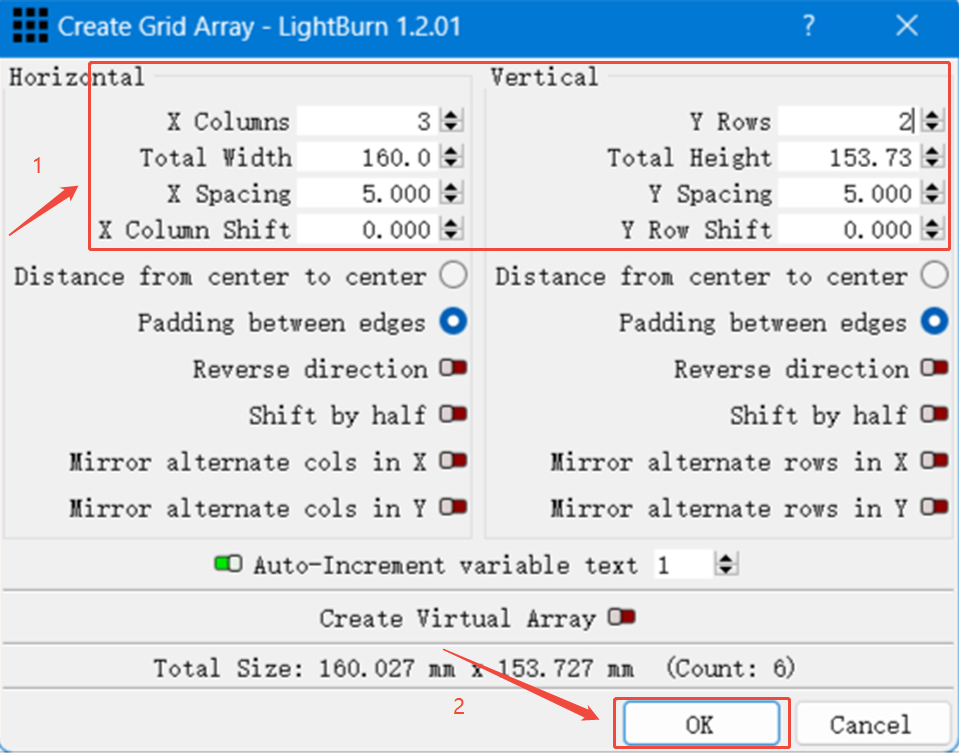
On the left-hand toolbar, click “Create an Array of the Selected Objects.” A configuration panel will appear.
Explanation of Parameters:
X Columns = 3
Sets the number of objects horizontally (i.e., 3 objects per row).
Y Rows = 2
Sets the number of objects vertically (i.e., 2 objects per column).
Total Width = 160 mm
Defines the total width of the entire array along the X-axis.
Total Height = 153.73 mm
Defines the total height of the entire array along the Y-axis.
X Spacing = 5 mm
Sets the horizontal spacing between adjacent objects.
Y Spacing = 5 mm
Sets the vertical spacing between adjacent objects.
Confirm and Apply
After configuring the array parameters, click “OK.” A 3x2 matrix of cat designs will be generated automatically.
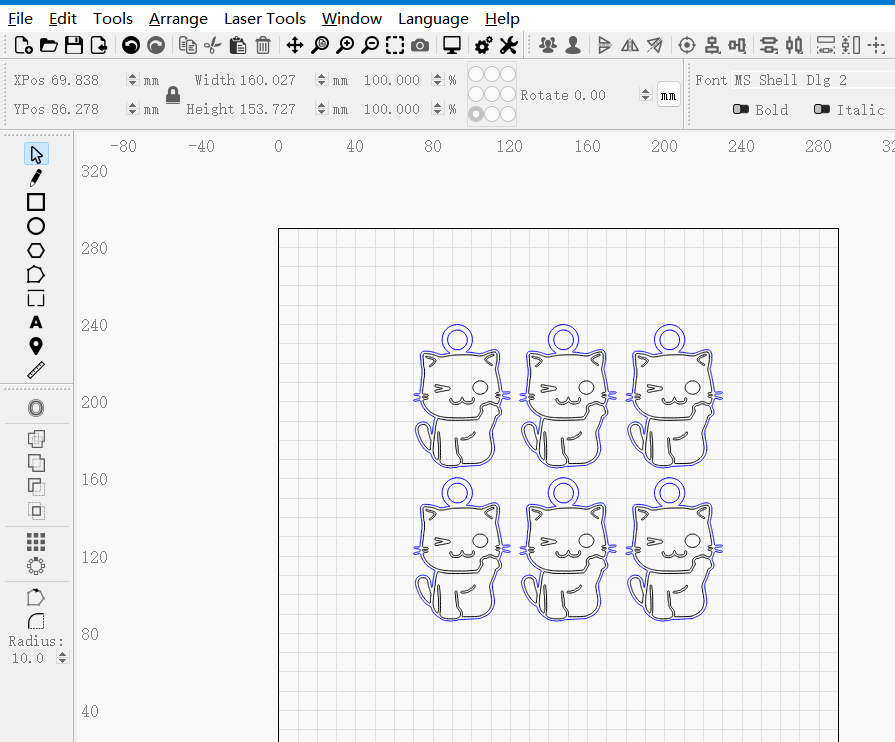
This feature significantly boosts productivity and simplifies the engraving or cutting process, especially when working with repeated patterns or mass production tasks.
Conclusion
Creating repeating patterns manually can be time-consuming and may result in uneven spacing.
With the Create Array function in LightBurn, users can quickly duplicate selected objects and create organized patterns with consistent spacing.
By learning this simple design feature, LONGER laser engraver users can improve their LightBurn workflow and create more efficient engraving projects.
Share:
LONGER How to:The Impact of Line Interval on Image Quality in LightBurn
Glass Laser Engraving: How to Engrave Glass with Longer Laser Engravers