
When working with LightBurn for laser engraving and cutting, you may often reuse the same graphics, patterns, or design elements. Instead of importing the same files repeatedly, LightBurn’s Art Library provides a convenient way to store and manage frequently used artwork.
This feature helps keep your design resources organized and makes your workflow faster. In this guide, we’ll show you how to enable, create, import, and use the Art Library in LightBurn.
Enabling the Art Library Window
To start using the Art Library, first open the feature from the LightBurn menu. Go to the “Window” menu at the top of the LightBurn interface, then select “Art Library.”
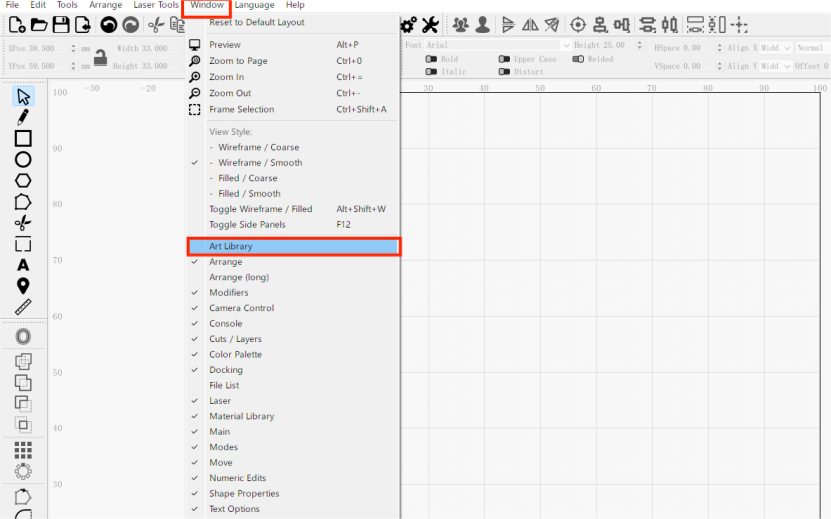
After enabling it, the Art Library panel will appear in the workspace. By default, it is usually docked on the left side of the screen. You can move the panel to another location if needed. Simply drag the Art Library window and release it when the blue docking guide appears.
Creating a New Art Library
If you want to create a new empty library, follow these steps:
- Open the Art Library panel.
- Click the “New” button.
- Choose a storage location on your computer.
- Enter a name for your library file.
- Save the new library.
After creation, you can start adding artwork to the library. LightBurn saves Art Library files with the .lbart file extension. These files store your saved artwork in a compact format and can be loaded again whenever needed.
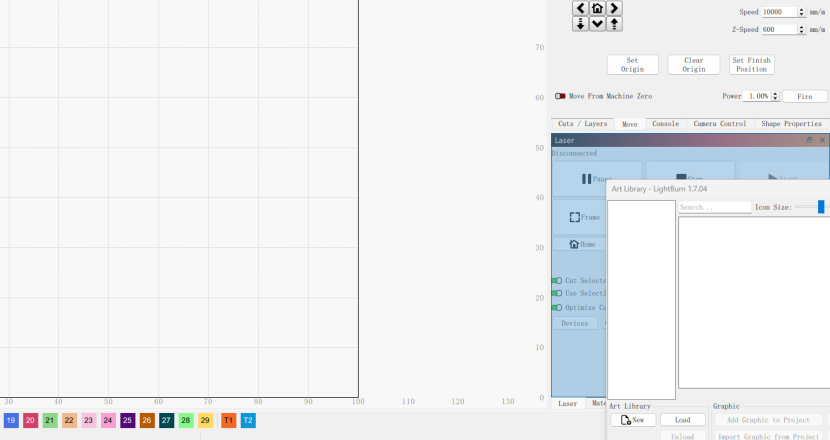
Understanding the Art Library Layout
The Art Library window is divided into two main areas:
- The left side displays all loaded libraries.
- The right side shows the artwork stored in the selected library.
You can load multiple libraries at the same time. For easier management, it is recommended to organize libraries by purpose or theme. For example:
- Holiday designs
- Animal graphics
- Product templates
- Test patterns
- Box designs
Keeping artwork organized makes it easier to find the files you need during a project.
Importing Artwork into the Art Library
There are two main ways to add artwork to your LightBurn Art Library.
Method 1: Import Artwork from Your Computer
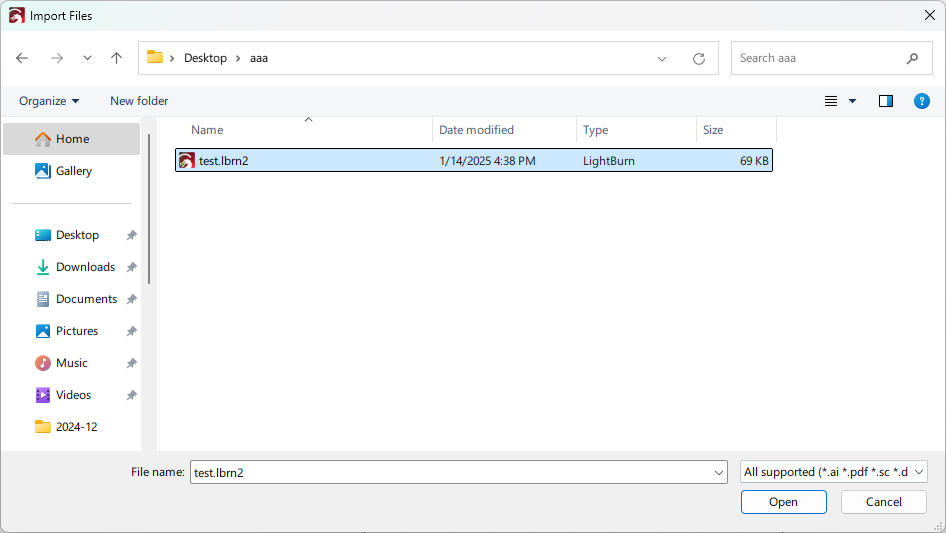
If you already have vector files saved on your computer, you can add them directly to the library. Steps:
- Click the “Import” button in the Art Library panel.
- Select the artwork files from your computer.
- Confirm the import.
You can import multiple files at the same time. Each imported file will appear as a separate item in the selected library.
Method 2: Add Artwork from Your Current Project
You can also save artwork that is already open in your LightBurn project. Steps:
- Select the artwork on the LightBurn canvas.
- Choose one of the following options:
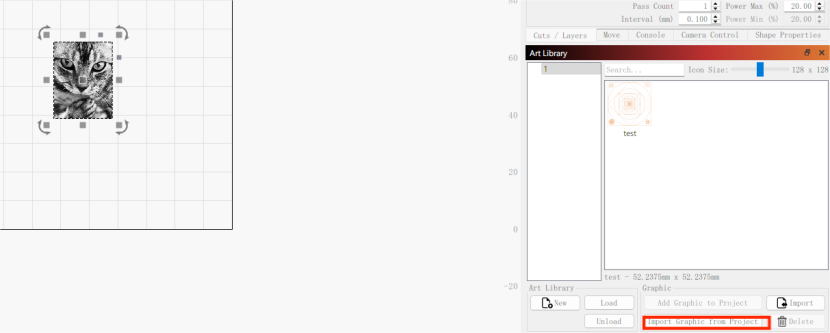
- Click “Import Graphic from Project” in the Art Library panel.
- Right-click inside the Art Library panel and select “Add Selection to Library.”
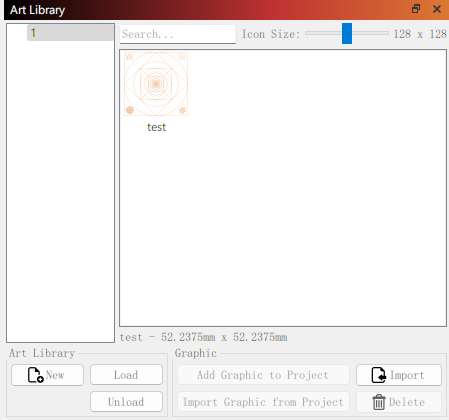
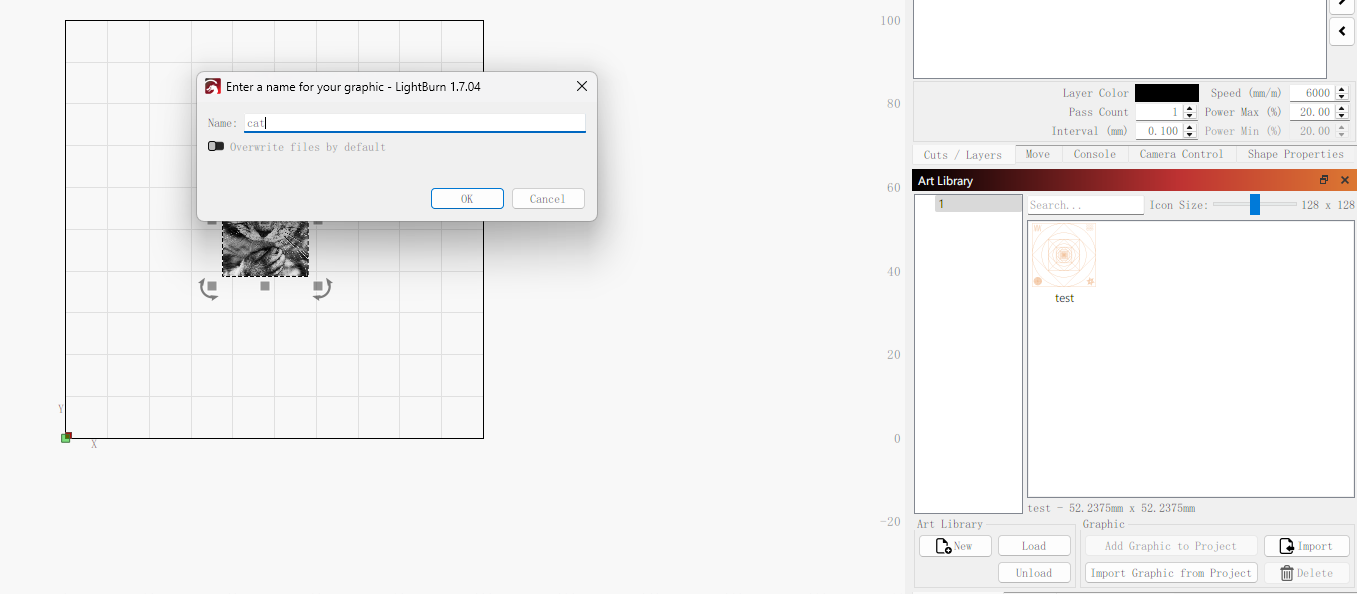
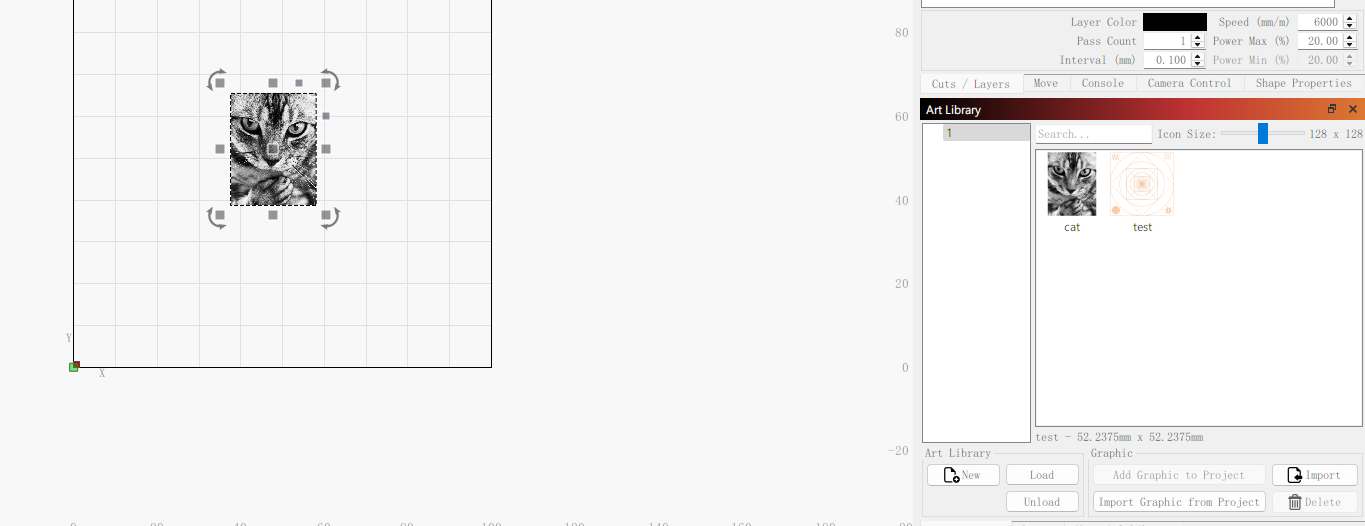
LightBurn will ask you to enter a name for the item. After saving, the artwork will appear in the library.
Using Artwork from the Art Library
Once your designs are stored in the Art Library, adding them to a project is simple. You can:
- Double-click an artwork item in the right panel.
- Drag and drop the artwork directly onto the LightBurn workspace.
The selected design will be added to your current project. You can then edit its size, position, or engraving settings like any other object.
Managing Art Library Content
- To delete an artwork item from the library, select the item and click the “Delete” button in the lower-right corner.
- To load a previously saved library, click “Load” at the bottom of the Art Library panel and select the appropriate .lbart file.
- To unload a library (remove it from the view but not delete it from your hard drive), click “Unload.”
This allows you to manage multiple themed libraries and keep only the relevant ones visible during a project.
Conclusion
The Art Library in LightBurn is a useful feature for saving, organizing, and reusing artwork. Whether you create personalized gifts, product designs, or engraving templates, it can help reduce repeated work and improve your design process.
By organizing your graphics into different libraries, you can quickly access your commonly used designs and keep your laser projects more efficient. Once you become familiar with this feature, the Art Library can become a reliable part of your LightBurn workflow.
Partager:
How to Install and Setup the new Longer Ray5 Mini
LONGER How To:Install the latest 30W Laser Module for Longer Ray5