
In 3D printing, proper extrusion flow calibration is important for achieving accurate dimensions and better surface quality. If the flow value is too high or too low, the printed model may have problems such as gaps, excess material, or uneven surfaces.
This guide explains what printing flow means, how to identify extrusion issues, and how to adjust the flow value through calibration tests in Cura.
What Is Printing Flow?
Printing flow controls the amount of filament extruded by the printer during printing. The flow value is related to the rotation speed of the extruder motor gear. When the gear rotates faster, more filament is pushed through the nozzle within the same amount of time.
A correct flow setting ensures that the printer extrudes the proper amount of melted filament needed to create the model accurately.
Common Flow Problems
Depending on the flow value, 3D prints usually fall into three situations.
- Underextrusion(too low flow), which occurs when little material is extruded and has prints with small gaps that appear between two layers or between two perimeter lines
- Extrusion(correct flow), which when the right amount of material is extruded and has prints free of external defects
- Overextrusion(too high flow), which occurs when too much material is extruded and features blobs prints on the outer walls and accumulation of unnecessary material on the upper layers
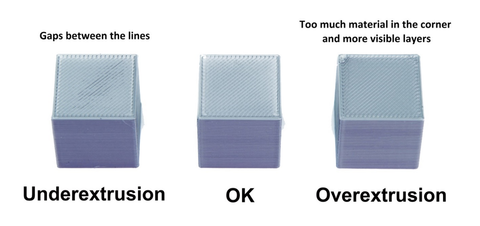
If the prints are affected by underextrusion, then it will be necessary to increase the print flow; instead, in case of overextrusion it will be necessary to decrease the print flow. In order to determine the exact amount of decrease/increase in flow, empirical tests can be failed to provide accurate reference data.
How to Calibrate Printing Flow
Because every printer and filament combination can behave differently, testing is needed to find a suitable flow value. The following method uses a calibration cube to measure actual extrusion width.
- Download the following calibration cube.stl: https://thingiverse.com/thing:5118535
- Import the cube.stl into Cura and apply the following slicing settings:
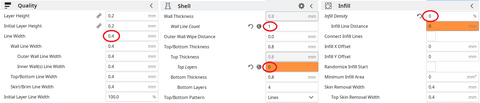
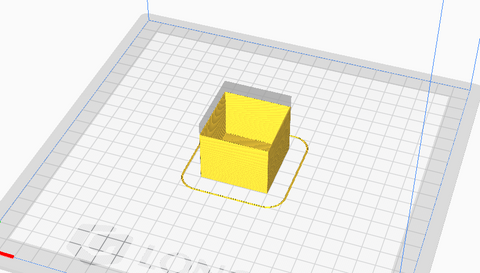
- Print the cube, which will have only one perimeter wall, empty and without a top layer
- When printing is complete, proceed to the measurement of the walls with a gauge
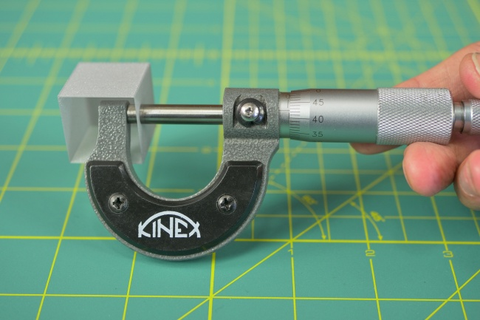
Each wall will have a certain size, which may be less, equal or greater than 0.4mm; from the average of these values, the flow is calculated by applying the following formula:
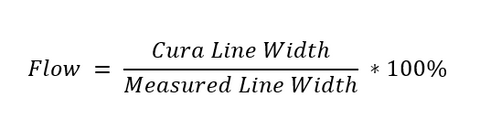
Therefore, assuming that the average of the measured walls is 0.5mm wide despite it should be 0.4mm, the flow to be set turns out to be:
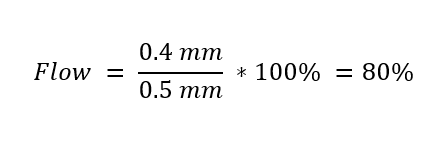
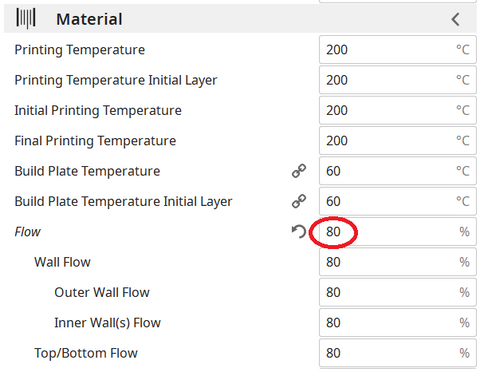
The result obtained must be set in the following Cura menu:
However, you have to pay close attention to the flow set, because even if it is the result of mathematical calculations, it is not always absolutely correct. In fact, the calculated flow can be to include errors due to a bad measurement with the caliber, from a bad leveling of the printing plane, and so on; therefore, it is a good idea to repeat the printing of the test cube several times to check for any variations, and above all it is necessary to verify that the prints do not yet have defects despite the new flow has been set correctly.
This means that, if, for example, mathematical calculations have returned a value of 80% as the correct flow, perhaps the best value for prints is that of an 85% stream. Then once the new flow is set, we proceed by increasing/decreasing the new value based on any aesthetic defects of the prints.
We proceed by applying a visual method:
- Restore Cura to default settings
- Print the cube.stl normally, with infill
- Visually examine the print quality of the cube
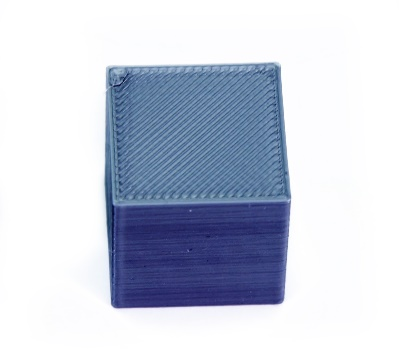
- If the flow has been set correctly, the upper layers will be smooth, shiny and without scarring or filament accumulations near the perimeters, with the layers perfectly joined.
- If there is too much material near the perimeters, slightly decrease the flow value and rerun the test.
If there are visible gaps between the layer lines, slightly increase the flow value and run the test again.
Conclusion
Printing flow calibration is an important step for improving 3D printing accuracy and surface quality. A correct flow setting helps ensure that the printer extrudes the right amount of filament and produces more consistent results.
By combining measurement-based calibration with visual testing, you can find a flow value that works well for your printer, filament, and printing conditions. Regular calibration can help reduce printing defects and improve overall print quality.
Partager:
Longer LK4 Pro & LK5 Pro – Upgrades by @Ciubecca
3D Printer Nozzle Size Comparing: Speed, Detail & Layer Height Explained