Products Tutorial

Learn how to get more from your LONGER machines with helpful tutorials and tips.

LONGER How To:Adjust the Red Dot Focusing Module on the Nano Duo

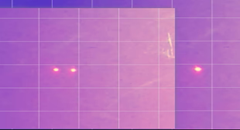
The red dot focusing module on the Longer Nano Duo helps users quickly align the laser’s focal point for precise engraving. If the red dots become misaligned due to movement or impact, it’s essential to recalibrate the system. This guide covers how to find the correct focal distance (220.5mm), activate the red dot in both the device screen and LaserBurn software, and manually align the dual red lasers using simple tools. Proper adjustment ensures high engraving precision and reduces errors caused by focus issues.

Weiterlesen

LONGER How To: Make a Custom Rubber Stamp with the Ray5 10W Laser Engraver

This guide shows how to create a personalized rubber stamp using the LONGER Ray5 10W laser engraver and 3mm basswood. From designing curved text and icons in LightBurn, to engraving and cutting with optimized laser settings, the process is straightforward and fun. By mirroring the design and ensuring deep engraving, users can produce high-quality stamps ideal for crafts, packaging, and personalized branding. A great DIY project to showcase creativity and precision with laser technology.

Weiterlesen

LONGER How To:Install the latest 30W Laser Module for Longer Ray5

The Longer Ray5 laser engraver now supports a powerful 30W laser module, expanding its capabilities for cutting and engraving a wider range of materials more efficiently. This guide provides step-by-step instructions for installing the 30W module, including hardware adjustments, cable connections, and firmware updates. With the upgrade complete, users can enjoy faster processing times and greater creative freedom for their laser projects. Be sure to refer to the included manual and this guide to ensure a smooth installation.

Weiterlesen

LONGER How To: How to Add and Use the Art Library in LightBurn

The Art Library in LightBurn is a powerful feature that lets users store, organize, and instantly reuse commonly used vector graphics. This guide walks you through enabling the library window, creating and saving custom libraries, importing artwork, and inserting graphics into projects. Perfect for Longer laser engraver users, the Art Library boosts productivity by keeping your favorite designs organized and ready to use—whether you're crafting gifts, running a small business, or working on personal engraving projects.

Weiterlesen

How to Install and Setup the new Longer Ray5 Mini

This setup guide walks beginners through the quick and easy installation of the Longer Ray5 Mini, a compact and portable laser engraver with 2.5W or 3.5W options. Ideal for first-time users, the machine arrives mostly pre-assembled. The tutorial covers laser module installation, cable checks, axis adjustments, power setup, focus alignment, and LightBurn configuration. With just a few simple steps, you'll be ready to start engraving creative projects at home or on the go.

Weiterlesen

LONGER How To:Enable Rotary Mode in LightBurn

This guide explains how to enable and configure Rotary Mode in LightBurn for engraving on cylindrical or symmetrical items using roller or chuck rotary attachments. From hardware connection to setting parameters like steps per rotation and object diameter, you'll learn everything needed for accurate rotary engraving. The tutorial includes tips for mirror output, axis selection, and test engraving to ensure optimal results. Perfect for makers using the LONGER Ray5 or similar laser engravers with rotary tools.

Weiterlesen

How to make an object positioning grid for Longer Nano & Longer Nano Pro

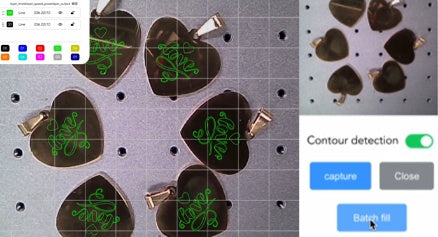
The Longer Nano and Nano Pro offer precision engraving via Galvo technology, but due to manual calibration, users may find the laser misaligned with the machine’s metal base. This guide walks you through creating a custom object positioning grid using plywood and LightBurn to ensure perfect alignment with the laser head. The engraved grid provides a consistent reference point for placing materials like business cards, improving accuracy, repeatability, and reducing material waste. Just be sure not to move the plywood after engraving, as it serves as the fixed alignment guide.

Weiterlesen

LONGER How To:Use Overcut in LightBurn for Laser Cutting

Overcut is a practical feature in LightBurn that slightly extends the laser cut path beyond the endpoint, ensuring complete separation and cleaner edges. This guide explains what Overcut does, why it matters—especially for thicker materials—and how to set it up effectively in LightBurn’s Cut Settings Editor. With step-by-step instructions and practical tips, you’ll be able to enhance the quality and precision of your laser cutting projects with ease.

Weiterlesen

LONGER How To:Offset Shapes in LightBurn

The Offset Shapes tool in LightBurn lets you generate new shapes at fixed distances from existing ones, making it ideal for creating borders, cut lines, and layered effects. This guide covers everything from accessing the tool to configuring offset distance, direction, and corner styles. You’ll also learn about advanced options like simplifying results and auto-selecting new shapes. Whether you’re engraving text or designing intricate vector art, mastering the offset feature ensures greater design precision and flexibility with your Longer laser engraver.

Weiterlesen