
The Longer B1 laser engraver supports multiple connection methods, including USB, microSD card, and wireless connection.
While USB is a common way to control the machine, using a WiFi connection with LightBurn provides a more flexible setup. It allows users to operate the Longer B1 without keeping the computer physically connected through a USB cable.
This guide explains how to set up the WiFi connection between the Longer B1 and LightBurn software step by step.
Note: This WiFi Bridge setup only works with the Longer B1 without the touchscreen installed. If the touchscreen and its related firmware are installed, this method will not work.
Step 1: Set Up WiFi Connection on Longer B1
Before connecting LightBurn, complete the WiFi setup on the Longer B1.
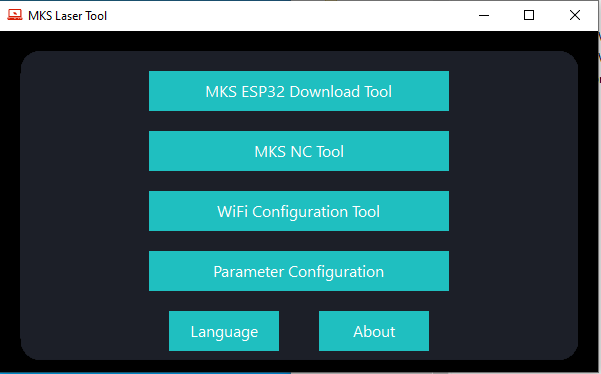
2. Once installed successfully, run the software as administrator. Then, choose “WiFi Configuration Tool”
3. In the next window, select the right COM port, add the name & password for own router and wait for the connection success. Once it’s done, Get IP and note it for future usage
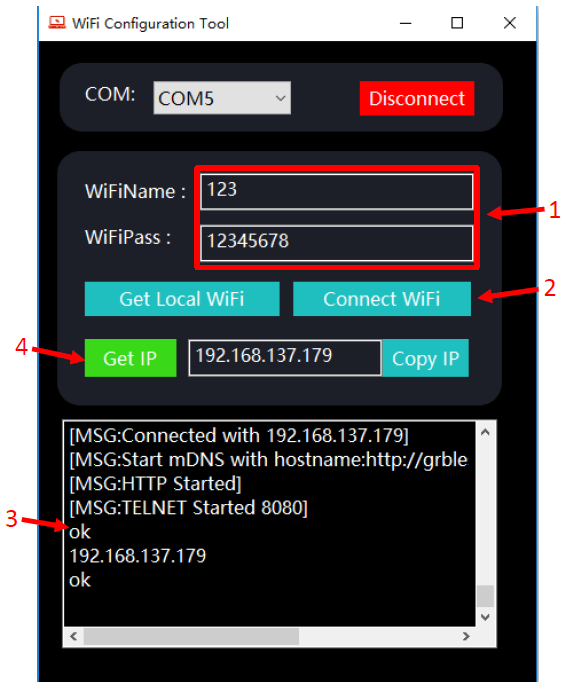
Note: The IP address of the Longer B1 may change after reconnecting. To avoid repeating this setup, it is recommended to set an IP reservation for the B1 MAC address in your router or access point DHCP settings.
Step 2: Configure LightBurn WiFi Connection
After the Longer B1 is connected to the WiFi network and the IP address is available, open LightBurn on your computer. Make sure:
- The computer is connected to the same WiFi router/access point as the Longer B1.

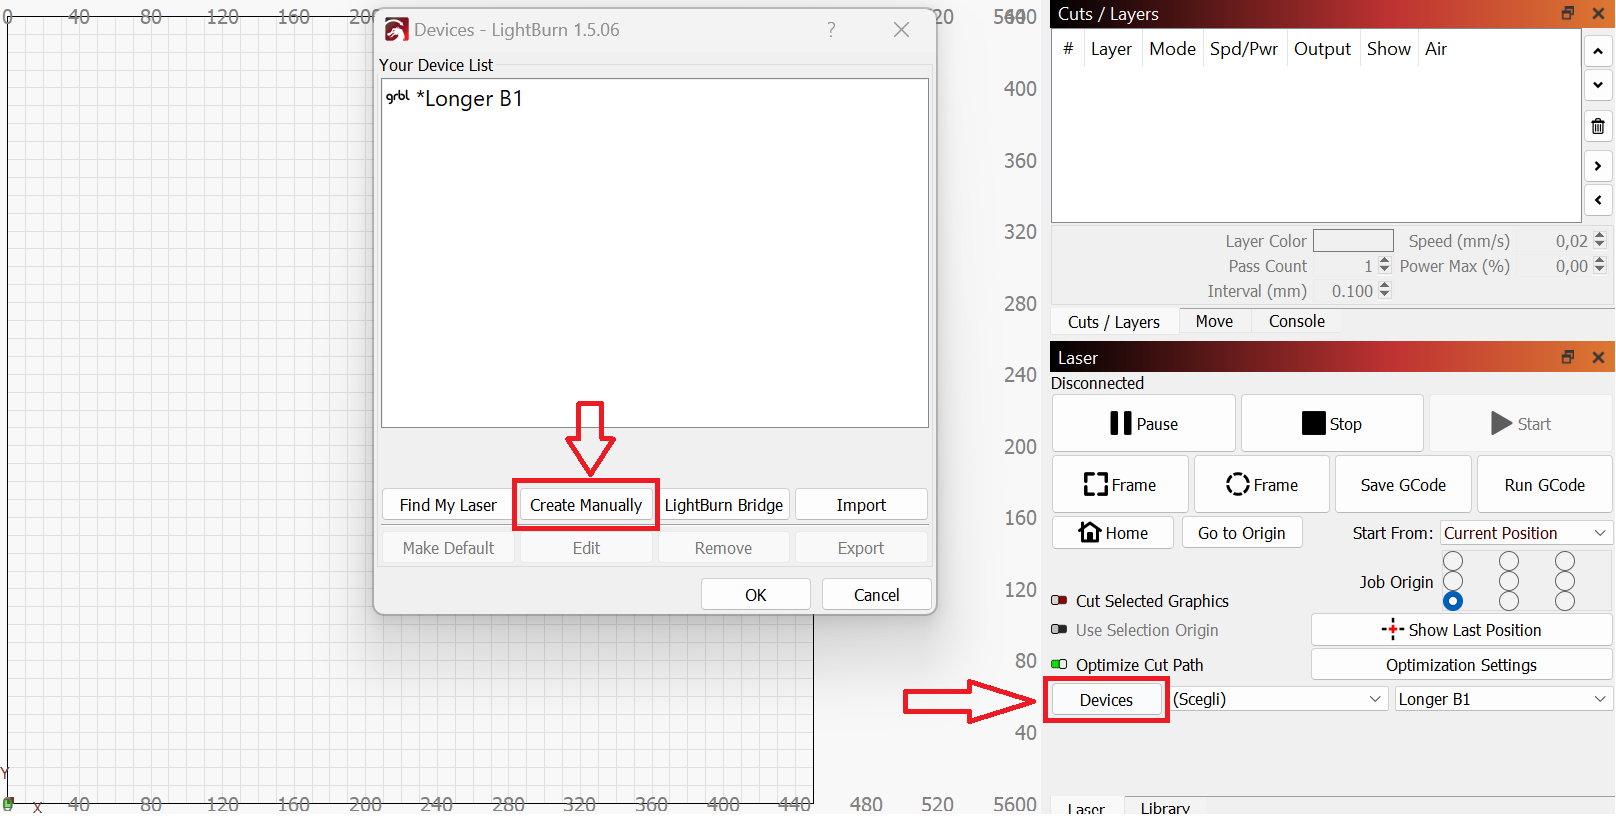
2. Click on "Devices", then click on "Create Manually" to add a new device
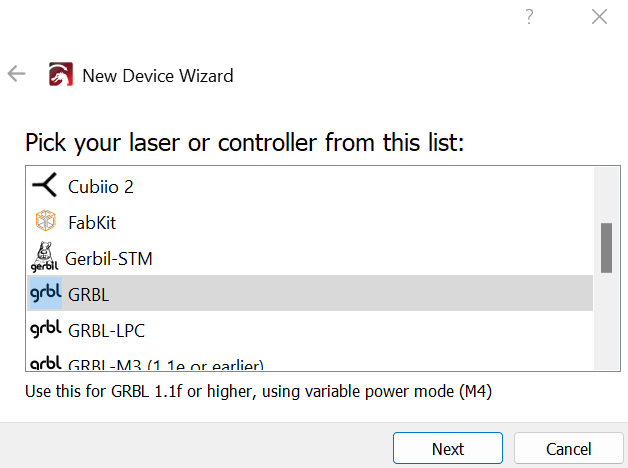
3. Select GRBL form the list, then click "Next" button
4. Select Ethernet/TCP and press "Next" button
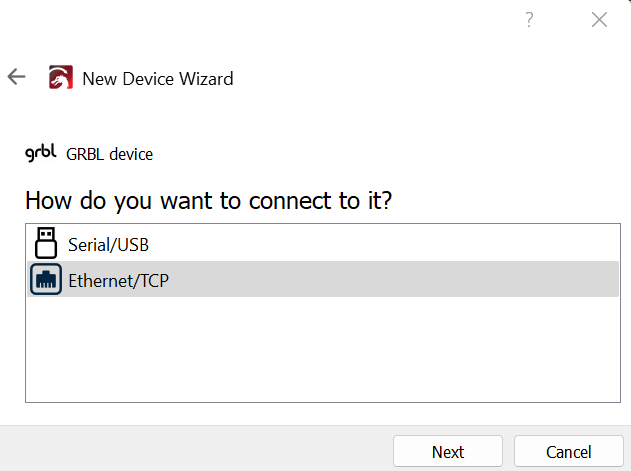
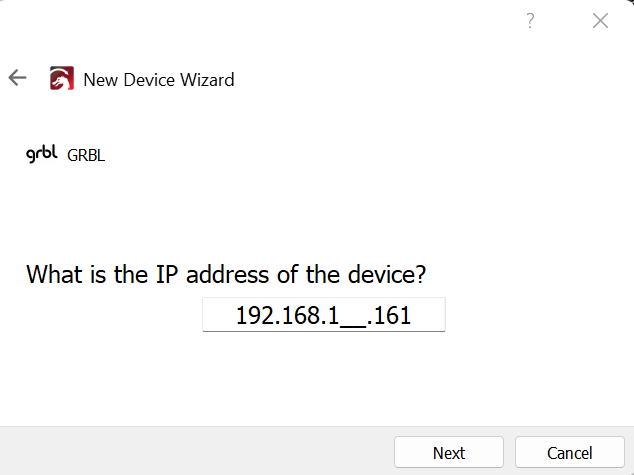
5. Enter the IP address you obtained earlier on the Longer B1 touchscreen (for example, 192.168.1.161)
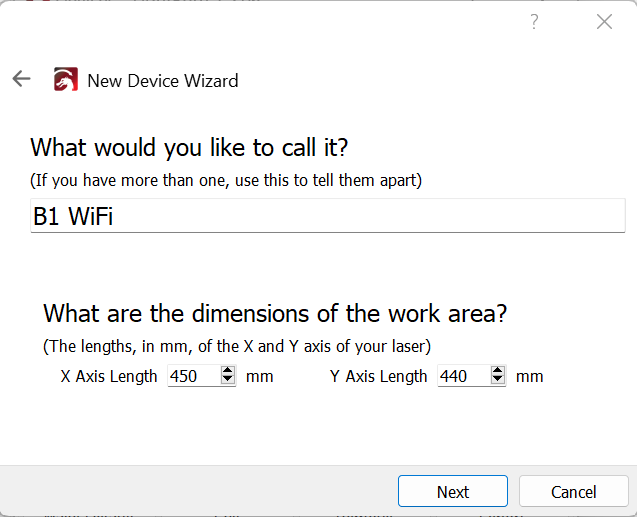
6. Enter the following data - Name: B1 WiFi / X = 450 / Y = 440
7. Select "Front Left" as your Origin and activate "Auto Home", then click "Next" button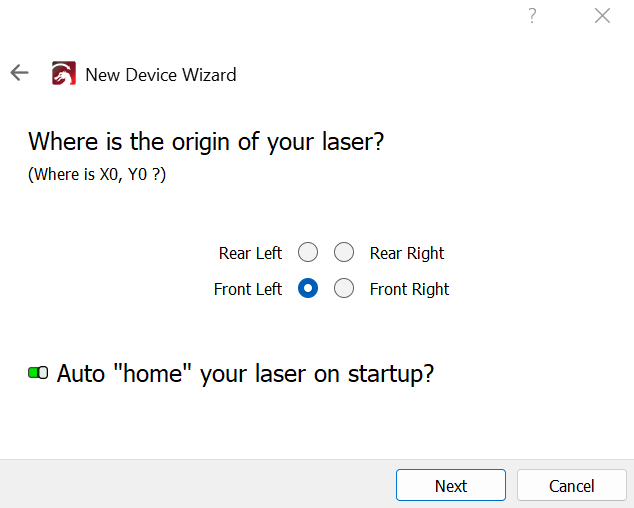
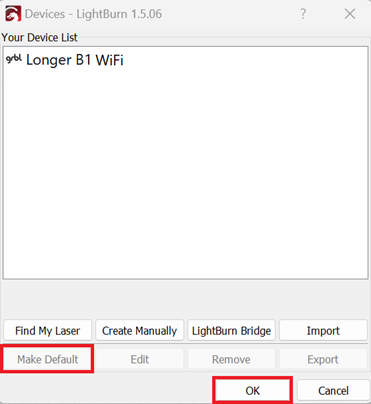
8. In the next window, press "Finish" to complete the setup, then select "B1 WiFi" and press "Make Default". Confirm with “OK”
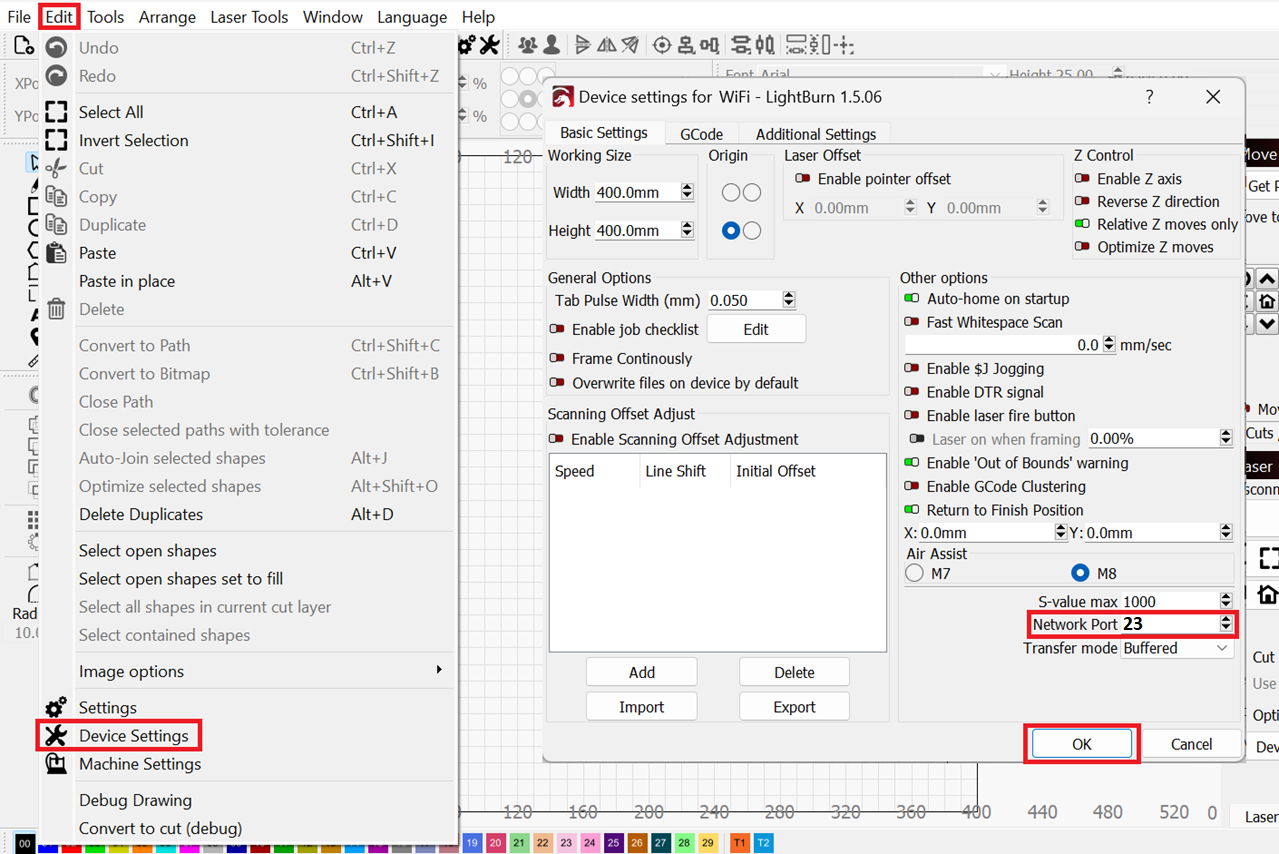
9. After successfully creating "B1 WiFi" you need to set up the correct Network Port. On the main screen, press "Edit" and then "Device Settings", then set "Network Port 23" and confirm with "OK"
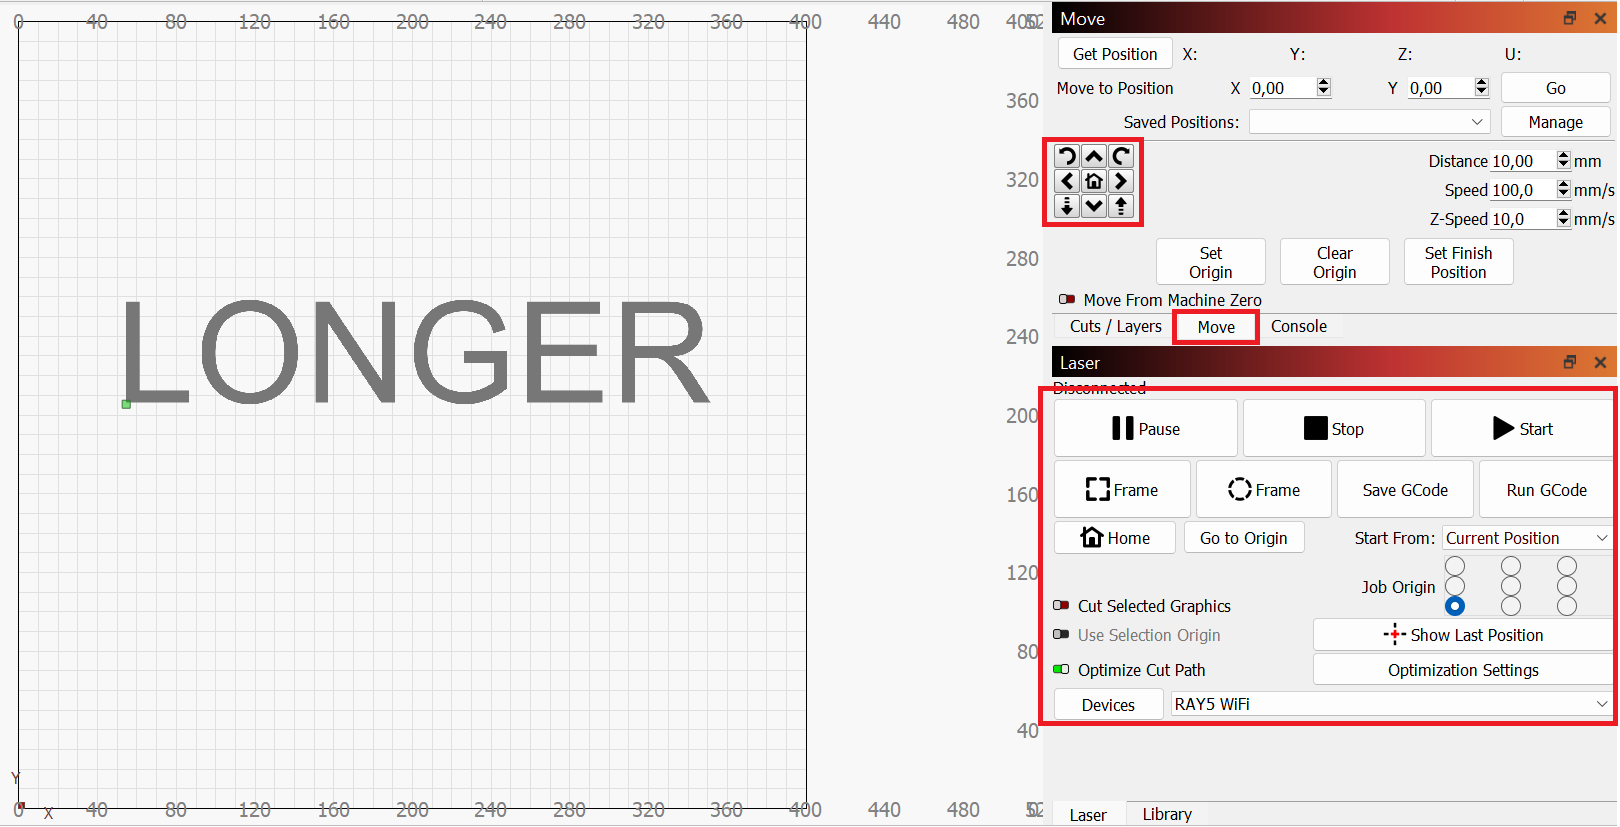
10. At this point, your B1 is ready to be used in LightBurn software in WiFi mode. Close Lightburn and restart it, and if everything has been done correctly, the connection status will change from "Disconnected" to "Ready", and it will be possible to move the laser module through the appropriate menu and start a laser engraving using the "Start" button, all without having to use any USB cable, but simply using the WiFi connection of your Router/AccessPoint
Please note that in order for the WiFi Bridge to work properly, both the Laptop and the Longer B1 must be connected to the same WiFi Router/AccessPoint.
Conclusion
The LightBurn WiFi Bridge provides a wireless connection method for the Longer B1, removing the need for a USB cable during operation. By completing the WiFi setup and LightBurn configuration correctly, users can control the Longer B1 more flexibly through a network connection.
Cuota:
LONGER Research: Advancements in Laser Engraving for Textile Production
LONGER Research: Exploring Longer B1 20W Laser Engraving for Smartphone Customization