
The Longer Nano & Nano Pro laser engravers support multiple connection methods, including USB connection, microSD card operation, and wireless control.
Besides the traditional Type-C USB connection, users can also connect LightBurn and Longer Nano/Nano Pro through WiFi. This wireless connection method reduces cable limitations and provides a more flexible engraving setup.
This guide explains how to configure the LightBurn WiFi Bridge connection for LONGER Nano and Nano Pro step by step. Before starting, make sure your laser engraver and laptop are ready for WiFi setup.
Why Use LightBurn WiFi Connection?
The traditional way to use LONGER Nano is connecting the machine to a laptop through a Type-C USB cable or running engraving files through the LONGER LaserBurn application.
However, USB connection distance is limited. A USB cable usually works within a short range, which may restrict your workspace setup. With the LightBurn WiFi connection:
- You can control the laser engraver without a USB cable.
- You can place the laptop in a more convenient position.
- The engraving workspace becomes more flexible.
For a better connection experience, keep the laptop and LONGER Nano connected to the same WiFi network.
Before You Start
Prepare:
- LONGER Nano or Nano Pro laser engraver
- Laptop with LightBurn installed
- WiFi connection
- Longer Nano microSD card with device file
Important: Both the laptop and LONGER Nano must be connected to the same WiFi network.
Step-by-Step Guide
Step 1: Power On LONGER Nano
Turn on the LONGER Nano and wait for a few seconds until the machine starts normally.
Step 2: Connect Laptop to LONGER Nano WiFi
On your laptop:
- Open WiFi settings.
- Search for the network: LongerNano_
- Connect to this WiFi network. WiFi password: 12345678
After successful connection, continue with LightBurn setup.

Step 3: Configure LightBurn Device Settings
1. Click on "Devices", then click on "Import" to add a new device
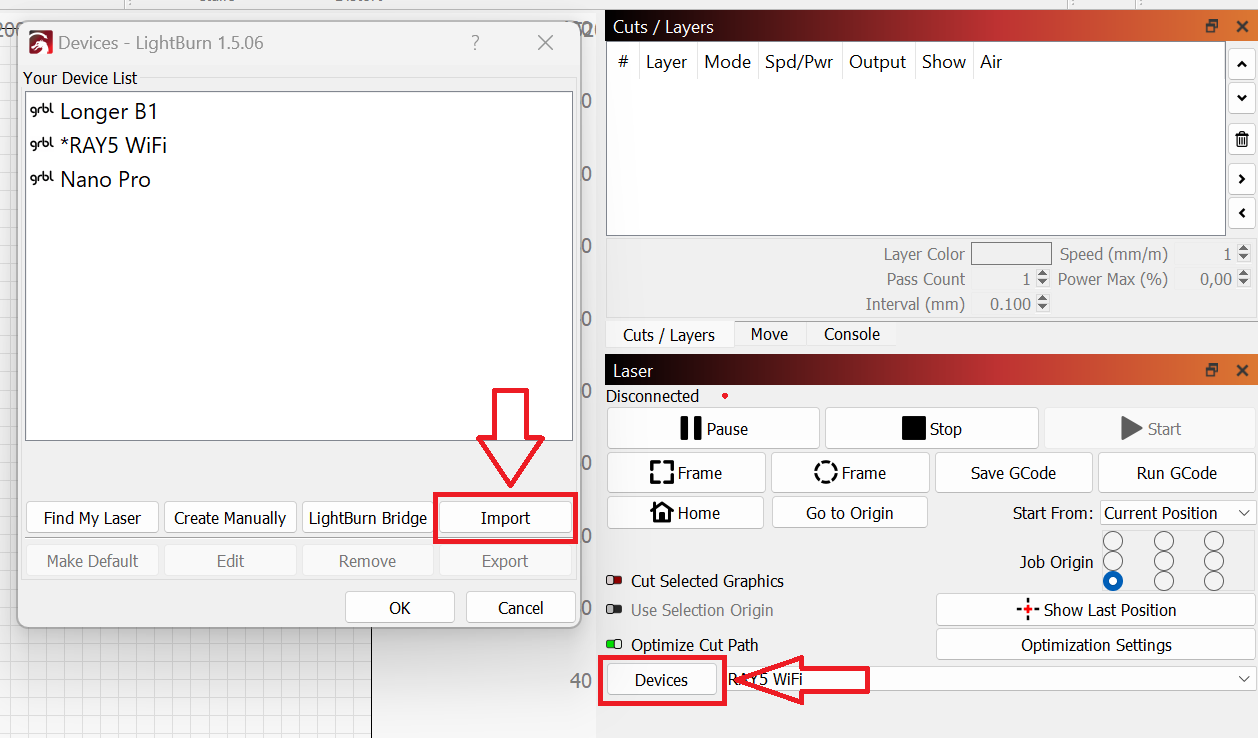
2. Select the Nano.lbdev file included inside the Longer Nano microSD card, and confirm the import
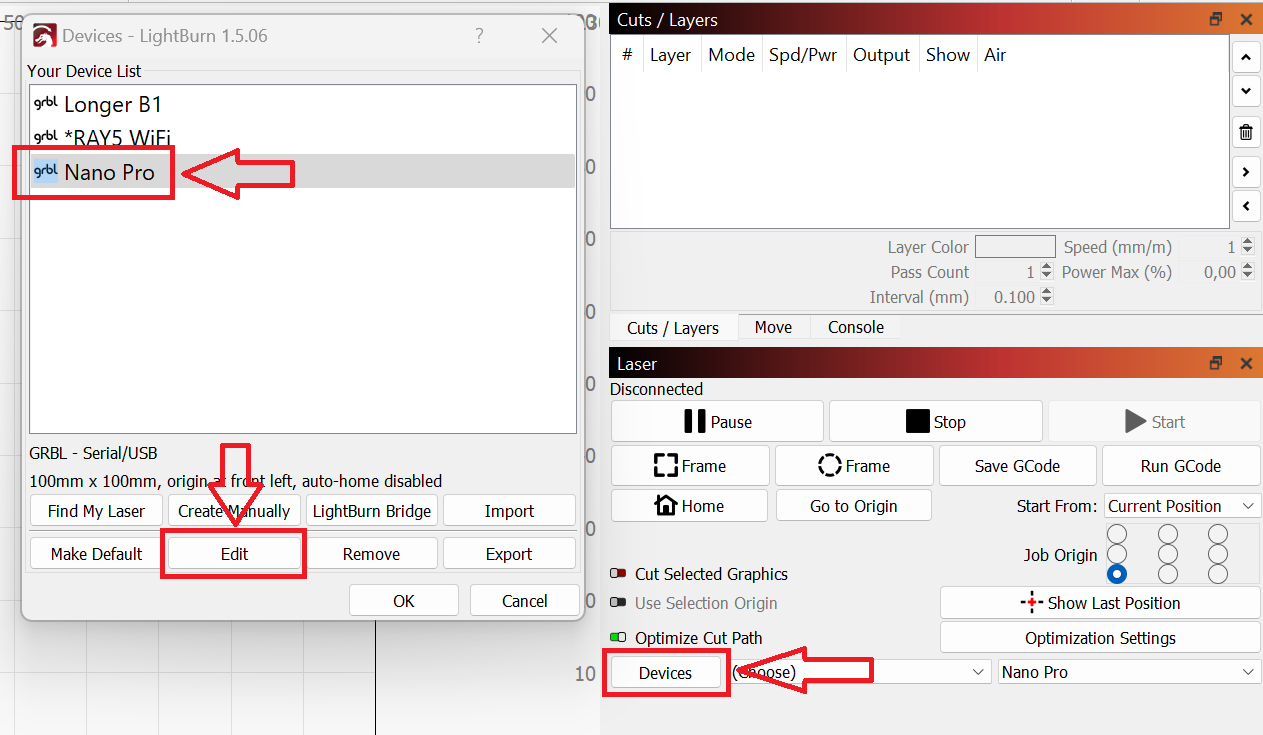
3. Once done, click again on "Devices", then select Longer Nano from the list, and then click on "Edit"
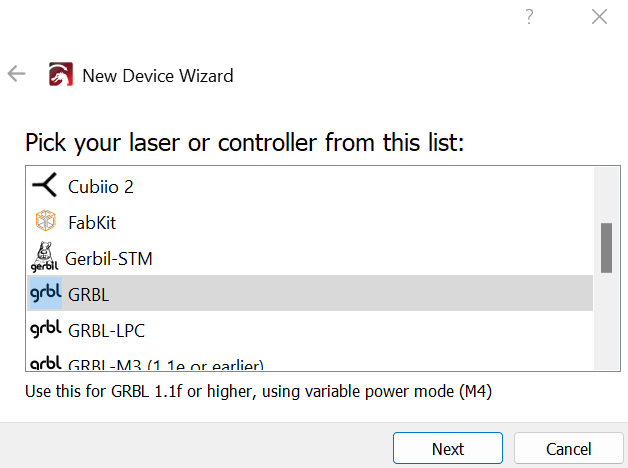
4. Select GRBL and press "Next" button
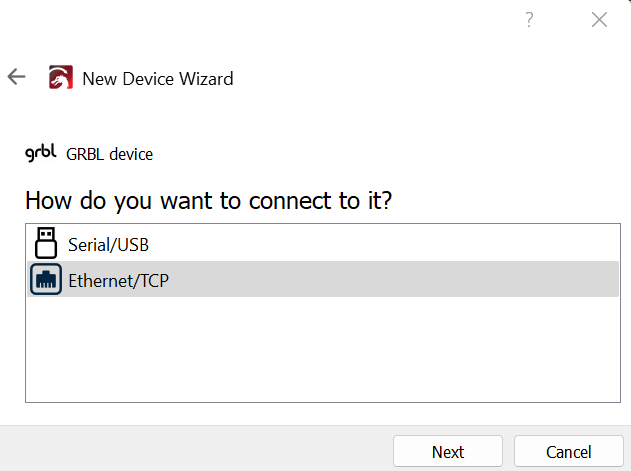
5. Select Ethernet/TCP and press "Next" button
6. Enter the IP address of the Longer Nano (192.168.0.1)
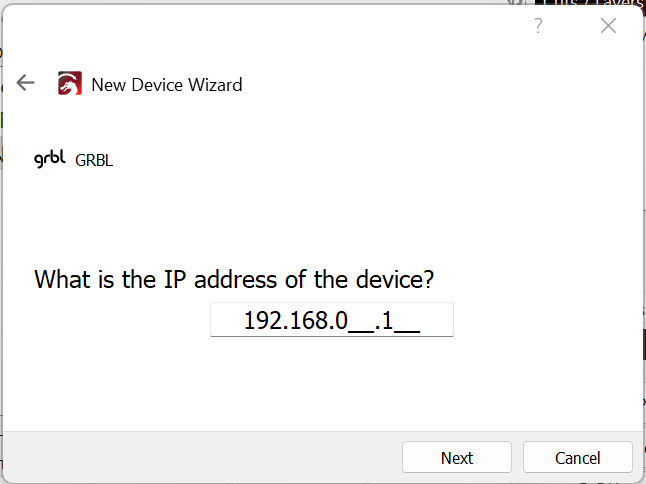
7. Enter the following data - Name: NANO Pro / X = 100 / Y = 100
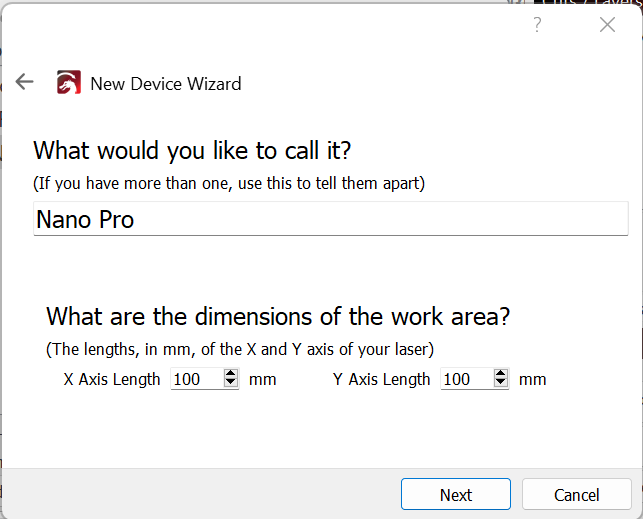
8. Select "Front Left" as your Origin and deactivate "Auto Home", then click "Next" button
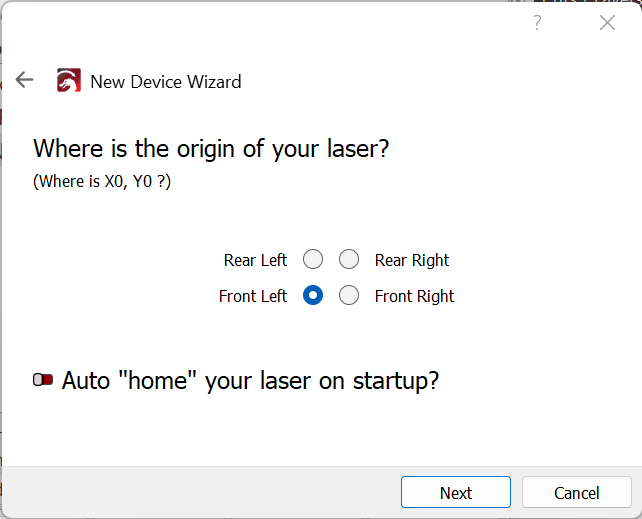
9. In the next window, press "Finish" to complete the setup
Step 4: Set Network Port
After creating the WiFi device:
- Open: Edit → Device Settings
- Set Network Port: 8847
- Click: OK
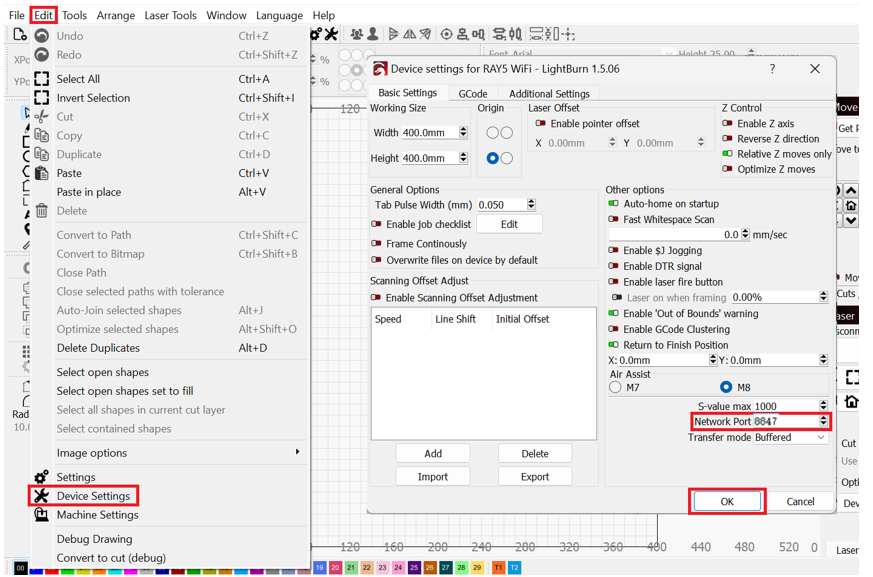
Step 5: Start Using LightBurn WiFi Mode
Restart LightBurn. If the setup is completed correctly, the connection status will change:
- Disconnected → Ready
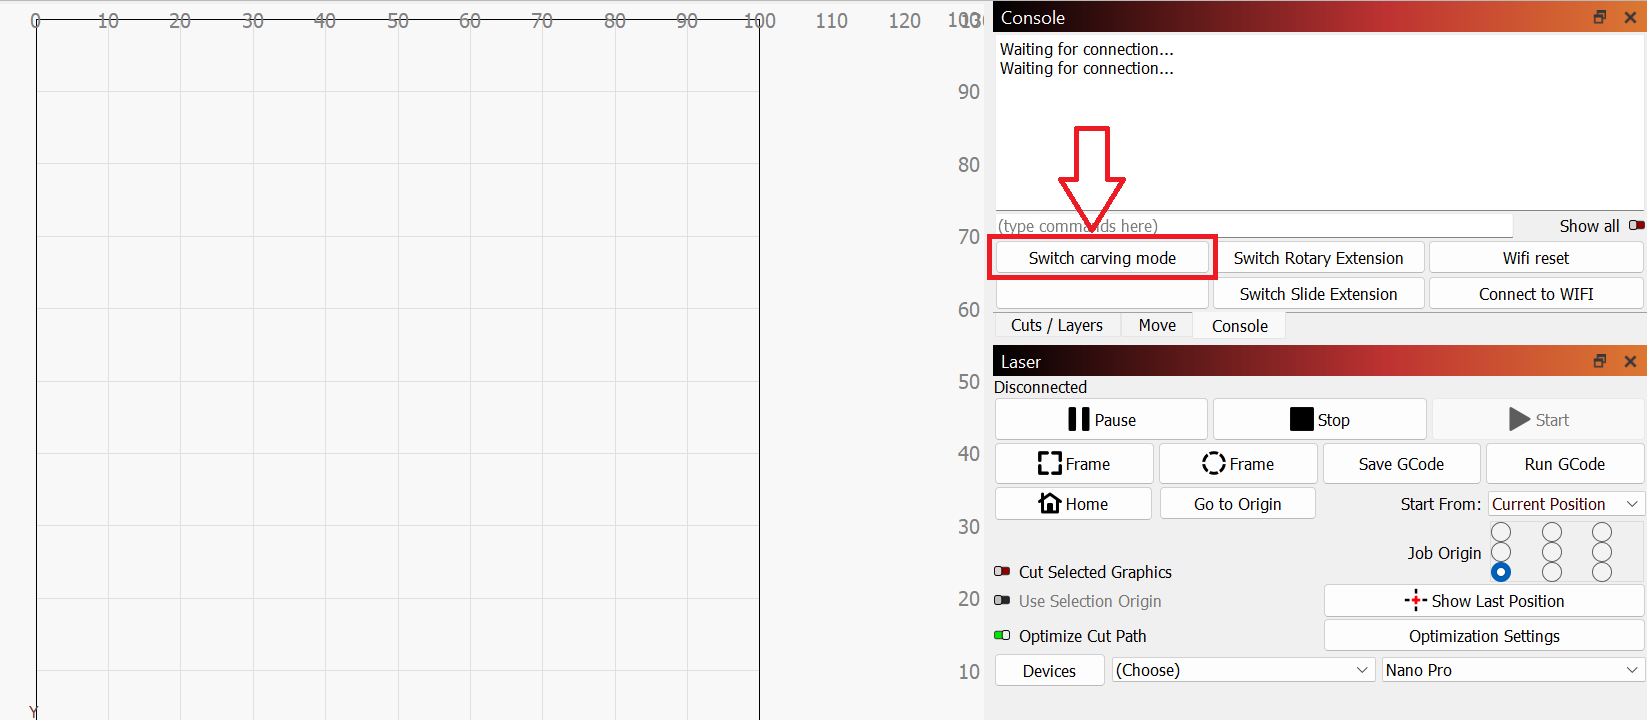
You can now control LONGER Nano through LightBurn WiFi mode and select the required carving mode.
WiFi Connection Is Unstable
Make sure:
- LONGER Nano and laptop are within a suitable distance.
- Both devices remain connected to the same WiFi network.
Conclusion
The LightBurn WiFi Bridge provides a convenient wireless connection method for LONGER Nano and Nano Pro laser engravers.
By completing the WiFi setup and LightBurn device configuration, users can control the machine without a USB cable and enjoy a more flexible engraving workflow. Follow the setup steps carefully to ensure a stable connection between LONGER Nano, Nano Pro, and LightBurn.
Cuota:
LONGER Test: Cutting images with LaserGRBL and Longer Laser B1 & Ray5
Investigación más extensa: Introducción al grabado en color sobre acero inoxidable con Nano Pro 12W