
Accurate object positioning is important for laser engraving, especially when creating precise designs or engraving multiple objects.
The Longer Nano and Longer Nano Pro laser engravers use a Galvo-Laser system to provide fast and efficient engraving. By creating a custom positioning grid, users can easily align engraving objects with the laser position and improve engraving accuracy.
This guide explains how to make a simple positioning grid for LONGER Nano and Nano Pro using LightBurn.
Why Create a Positioning Grid?
The Longer Nano and Longer Nano Pro are practical and versatile laser engravers designed for various creative projects.
To ensure engraving accuracy, each machine is manually calibrated through multiple factory jig tests. Because the Laser-Head is manually calibrated while the metal base is mass-produced, it is normal that the base pattern may not be perfectly aligned with the laser module.
However, users can easily create a custom grid that matches the exact position of the Laser-Head. This grid can then be used as a visual reference to accurately position engraving objects.
Step 1: Fix the Plywood Panel
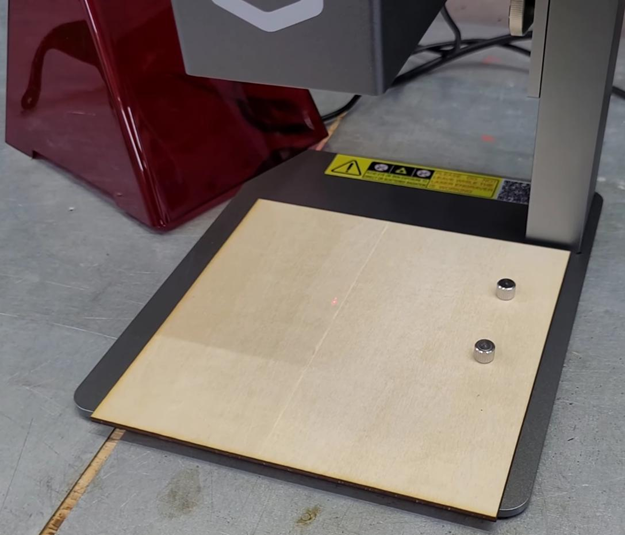
First, place a piece of plywood on the metal base of the Longer Nano or Nano Pro. Use the appropriate screws on the base to secure the plywood panel and make sure it cannot move during the engraving process.
Keeping the plywood fixed is important because the engraved grid will become the reference point for future positioning.
Step 2: Create a Grid in LightBurn
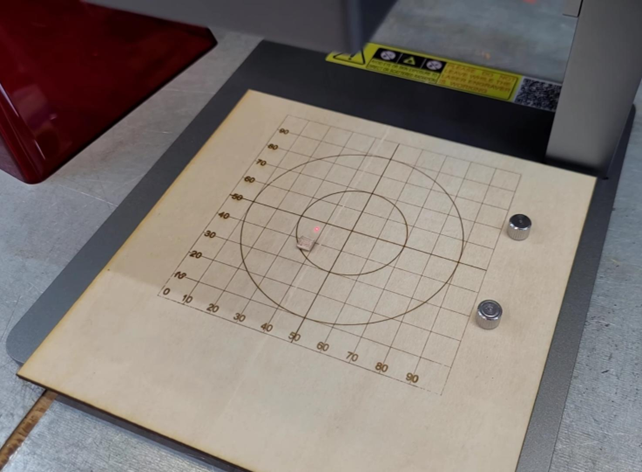
Open LightBurn and create a square grid design. You can set the grid size according to your needs:
- 10 × 10 cm
- 100 × 100 mm
After creating the grid, send the file to the laser engraver and engrave it onto the plywood panel.
Step 3: Use the Engraved Grid for Object Positioning
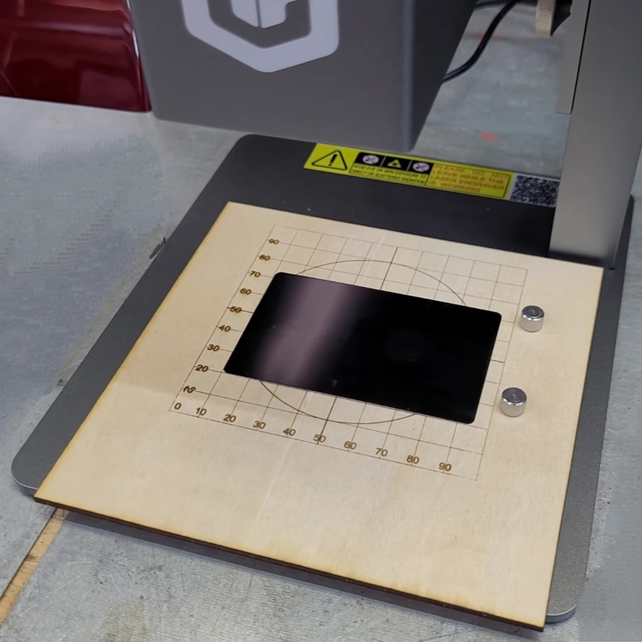
The engraved grid is perfectly aligned with the Laser-Head position. You can now use it as a reference for placing engraving objects.
For example, when placing a business card on the grid, you can easily match the object's position with the virtual grid in LightBurn. By using the same coordinates in LightBurn, the laser can engrave the design accurately on the selected area.
Important Notes When Using the Positioning Grid
This method provides a simple and effective way to create a reference grid for Longer Nano and Nano Pro.
However, the plywood panel must remain in the same position. If the panel moves, even slightly, the reference position will no longer match the laser position. In this case, you will need to repeat the process with a new plywood panel and create a new engraved grid.
Conclusion
Creating a laser engraving positioning grid is a simple way to improve object alignment on the Longer Nano and Nano Pro.
Once the grid is fixed in place, it provides a reliable visual reference that helps synchronize the LightBurn workspace with the actual engraving area. This can improve positioning accuracy, reduce material waste, and make repeated engraving projects easier to manage.
With this simple setup, users can achieve more consistent results and make better use of the precision capabilities of their Longer Nano series laser engravers.
Partager:
LONGER How To:Use Overcut in LightBurn for Laser Cutting
LONGER How To:Enable Rotary Mode in LightBurn