
In laser cutting projects, achieving clean edges and complete cuts is important for improving the final result. When cutting thicker or harder materials, the laser path may sometimes leave small uncut areas or rough edges.
The Overcut feature in LightBurn helps solve this problem by extending the laser cutting path slightly beyond the normal endpoint. This guide explains what Overcut does, why it is useful, and how to enable it in LightBurn.
What is Overcut?
Overcut refers to extending the laser’s path slightly beyond the actual endpoint of a shape during cutting. This ensures the material is completely severed — especially important for thicker or harder materials — and helps reduce edge imperfections such as burrs or uneven lines.
Why Use Overcut?
Using Overcut can improve laser cutting performance by helping reduce incomplete cuts, small burrs, and uneven edges for a cleaner finish. It is especially useful when working with thicker materials, as the extended cutting path helps the laser fully penetrate the material. For detailed designs or parts that require accurate fitting, Overcut can also reduce problems caused by incomplete cuts and improve overall cutting precision.
How to Set Up Overcut in LightBurn
Step 1: Launch LightBurn
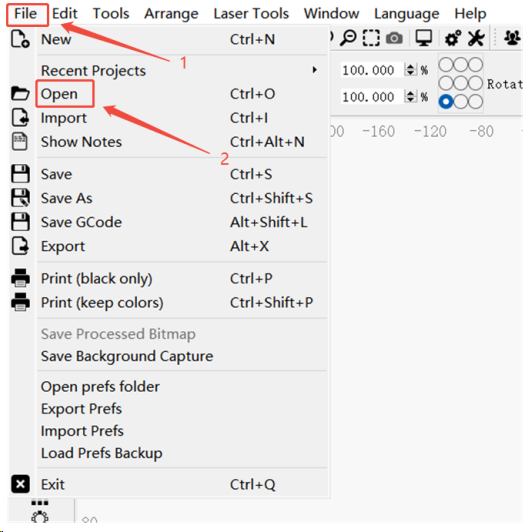
Open the LightBurn software. From the “File” menu, select “Import” to bring in your design file. Make sure your design is displayed correctly on the canvas.
Step 2: Select the Object to Apply Overcut
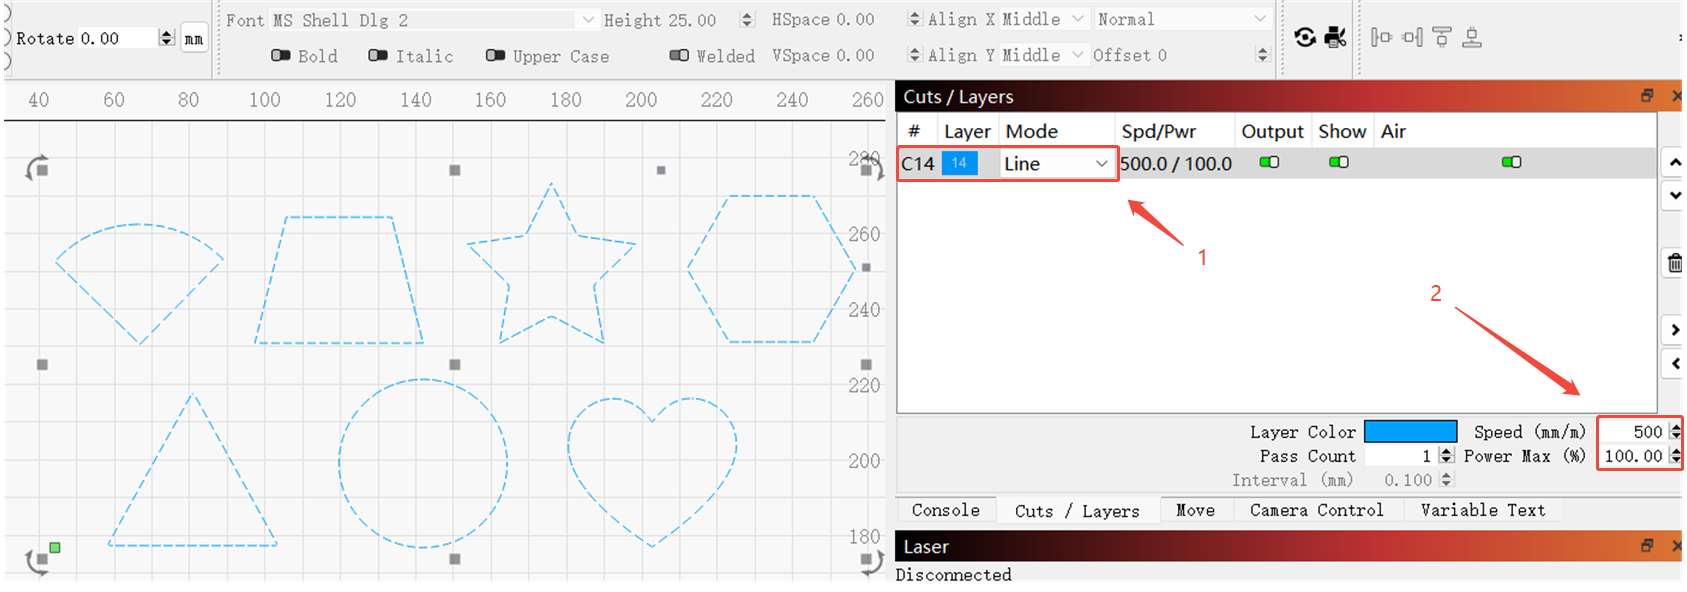
On the canvas, select the object you want to cut. In the "Cuts/Layers" panel on the right, select the layer you wish to modify. Make sure the cut mode is set to "Line", and adjust the speed and power settings as needed.
Step 3: Configure the Overcut Settings
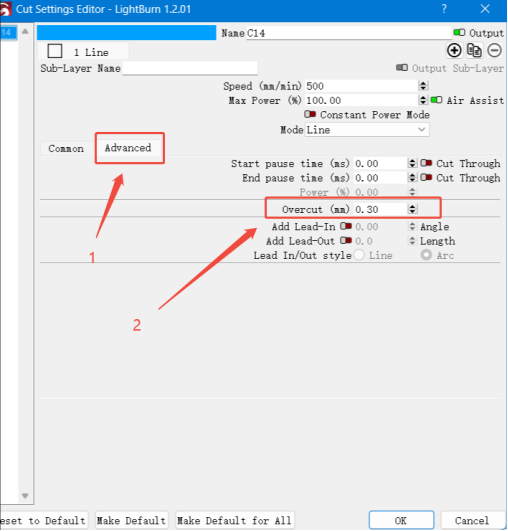
Click the color box of the selected layer to open the Cut Settings Editor. Then:
- Open the Advanced tab.
- Find the Overcut option.
- Enter the required overcut distance.
The suitable value depends on the material type and thickness. A common adjustment range is around 0.1 mm to 2 mm. Start with a small value and adjust based on test results.
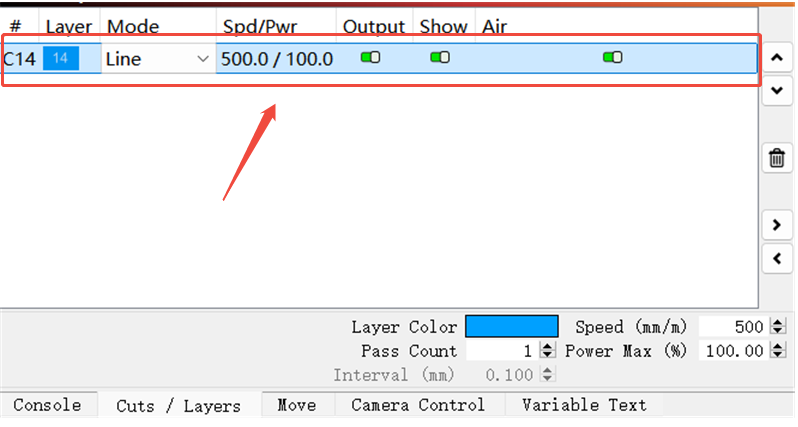
Step 4: Save and Start Cutting
Once all settings are configured, save your project and send the job to your laser machine.
Ensure that the laser's power and speed settings align with the overcut value to avoid incomplete cuts or overheating.
4. Tips & Recommendations
a) Understand your material:
Different materials respond differently to overcutting. You may need to fine-tune the value based on the material's properties.
b) Match power and speed:
Make sure the laser’s speed and power are properly balanced to complement the overcut distance.
c) Run a test cut:
Always perform a small-scale test before starting a full job. This helps you validate the overcut effect and fine-tune your settings.
Conclusion
The Overcut feature in LightBurn is a simple tool that can improve laser cutting results, especially when working with thicker or more difficult materials. By extending the cutting path slightly, it helps achieve cleaner edges, more complete cuts, and better overall accuracy.
Since every material behaves differently, testing and fine-tuning the Overcut value is the best way to achieve consistent results. With the right settings, you can create cleaner and more professional laser-cut projects.
Partager:
LONGER How To:Offset Shapes in LightBurn
How to make an object positioning grid for Longer Nano & Longer Nano Pro