
The Longer Ray5 adopts an MKS DLC32 mainboard, characterized by USB connectivity, wireless technology, microSD card reading, touchscreen display with graphic interface, and total interaction with your smartphone through the MKSLaser application.
The most common method of using Longer Ray5 is to connect the machine to your laptop via USB, or by exporting a G-code file to be run via the Longer Ray5 microSD. However, there is also an intermediate mode of operation based on WiFi connectivity, which allows you to use LightBurn and Longer Ray5 without a USB cable.
Compared with USB connection, which requires the device and laptop to be within a short distance (about 3–5 meters), WiFi mode allows greater flexibility and positioning freedom. This also improves operational convenience and can provide better safety during engraving, since the user can operate the machine from a distance. Therefore, using LightBurn in WiFi mode improves both efficiency and usability, expanding the overall user experience of Longer Ray5.
Step 1: WiFi Setup on Longer Ray5
To connect Longer Ray5 and Lightburn wirelessly, you must first complete the WiFi setup on the device. Follow these steps:
1. Tap the tool icon on the touchscreen's home page
2. Tap Wi-Fi icon on the top right corner of tool page
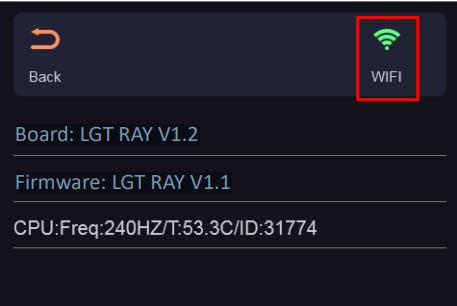
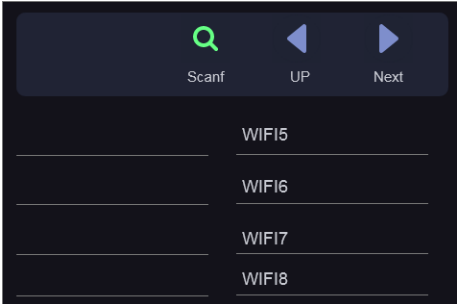
3. Select Wi-Fi name on Wi-Fi list page and enter password and waiting for connect to the WiFi Router/AccessPoint you selected
4. Check the current connected Wi-Fi status and take note of the IP address provided on the touchscreen
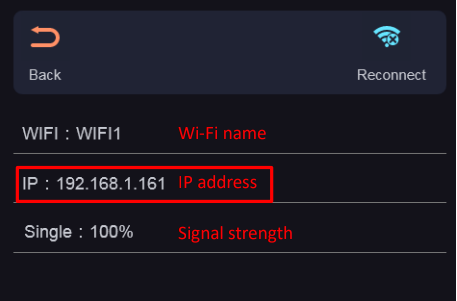
Once the WiFi connection is successful and the IP address is assigned and recorded, proceed to LightBurn setup.
Step 2: LightBurn WiFi Configuration
Before configuration, ensure that your laptop is connected to the same WiFi Router / Access Point as the Longer Ray5.
1.Connect your Laptop to the same WiFi Router/AccessPoint to which you have connected Longer Ray5

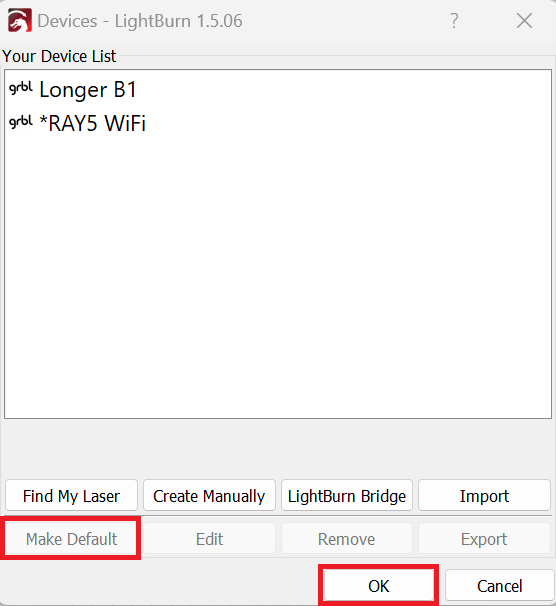
2. Click on "Devices", then click on "Create Manually" to add a new device
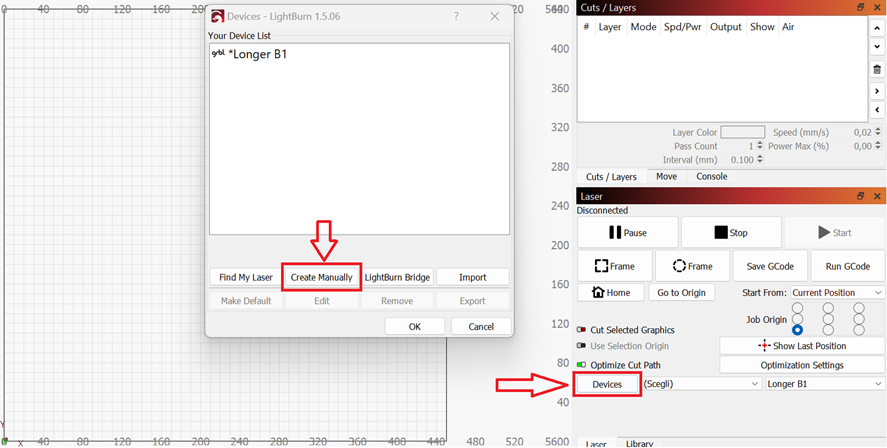
3. Select GRBL form the list, then click "Next" button
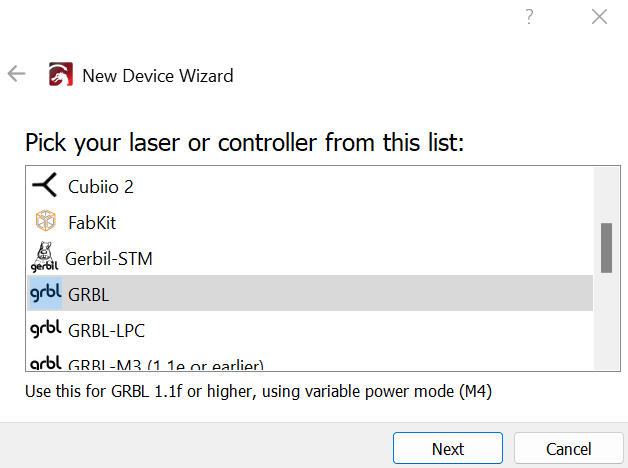
4. Select Ethernet/TCP and press "Next" button
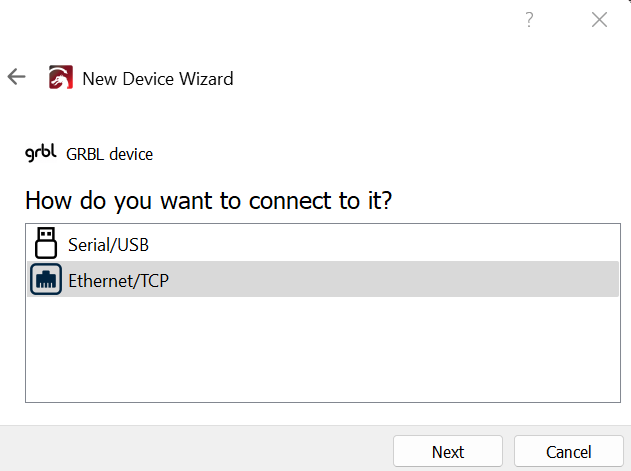
5. Enter the following data - Name: RAY5 WiFi / X = 400 / Y = 400
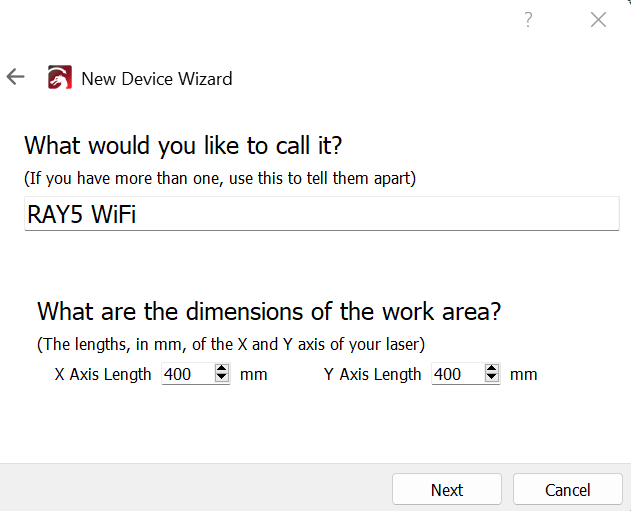
6. Select "Front Left" as your Origin and activate "Auto Home", then click "Next" button
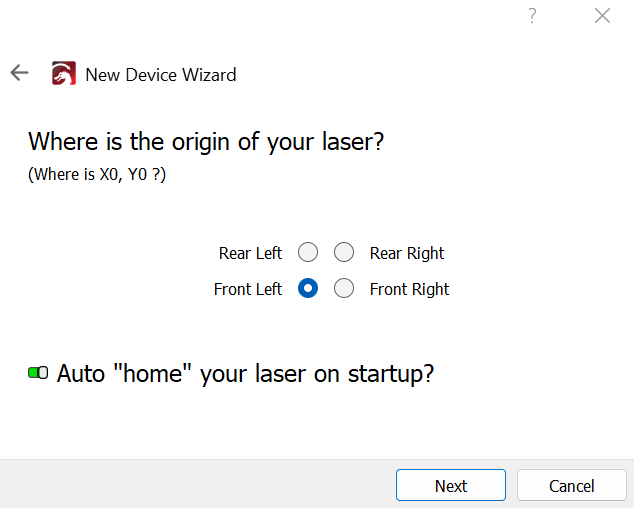
7. In the next window, press "Finish" to complete the setup, then select "RAY5 WiFi" and press "Make Default". Your RAY5 is ready to be used in LightBurn software in WiFi mode
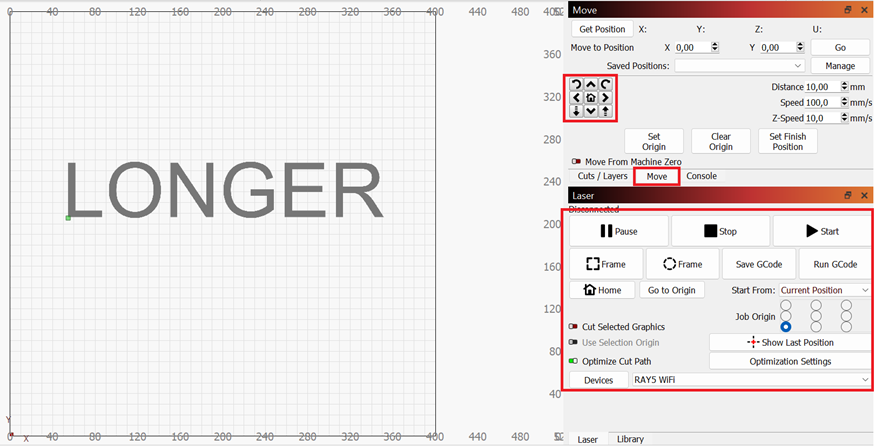
8. At this point, if everything has been done correctly, the connection status will change from "Disconnected" to "Ready", and it will be possible to move the laser module through the appropriate menu and start a laser engraving using the "Start" button, all without having to use any USB cable, but simply using the WiFi connection of your router/access point.
Important Notes: Please note that in order for the WiFi Bridge to work properly, both the Laptop and the Longer Ray5 must be connected to the same WiFi Router/AccessPoint.
Conclusion
WiFi connectivity provides a flexible and convenient way to operate the Longer Ray5 laser engraver using LightBurn without a USB cable.
By completing the WiFi setup and LightBurn configuration correctly, users can achieve stable wireless control, improved workflow flexibility, and safer distance operation during engraving tasks.
Share:
Longer Laserburn App – Multiple Work Layer
LONGER Research: Ray5 20W Medical Device Laser Marking